Configuration
Add Quote Button
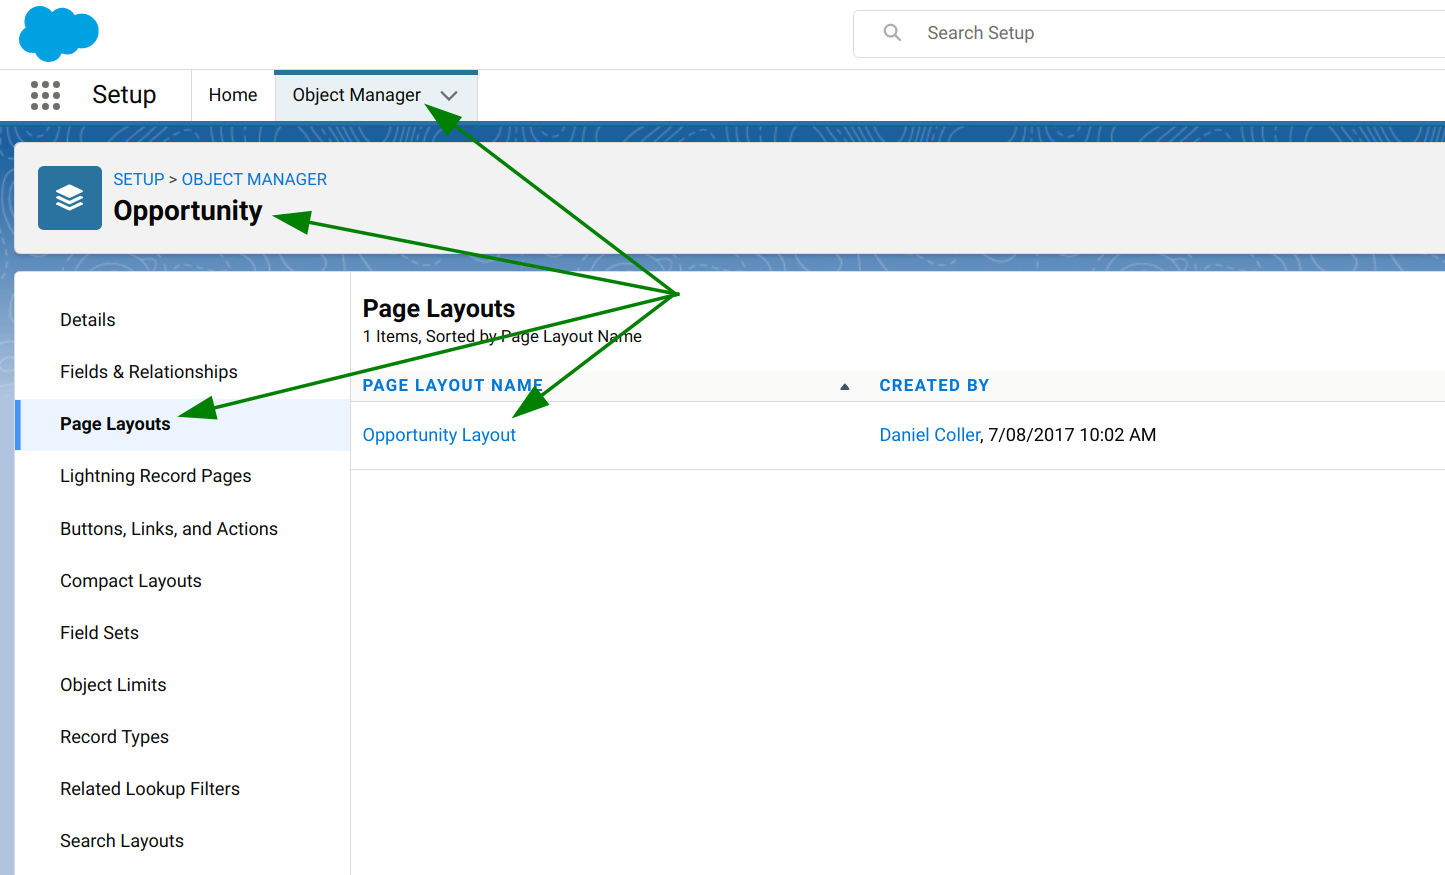
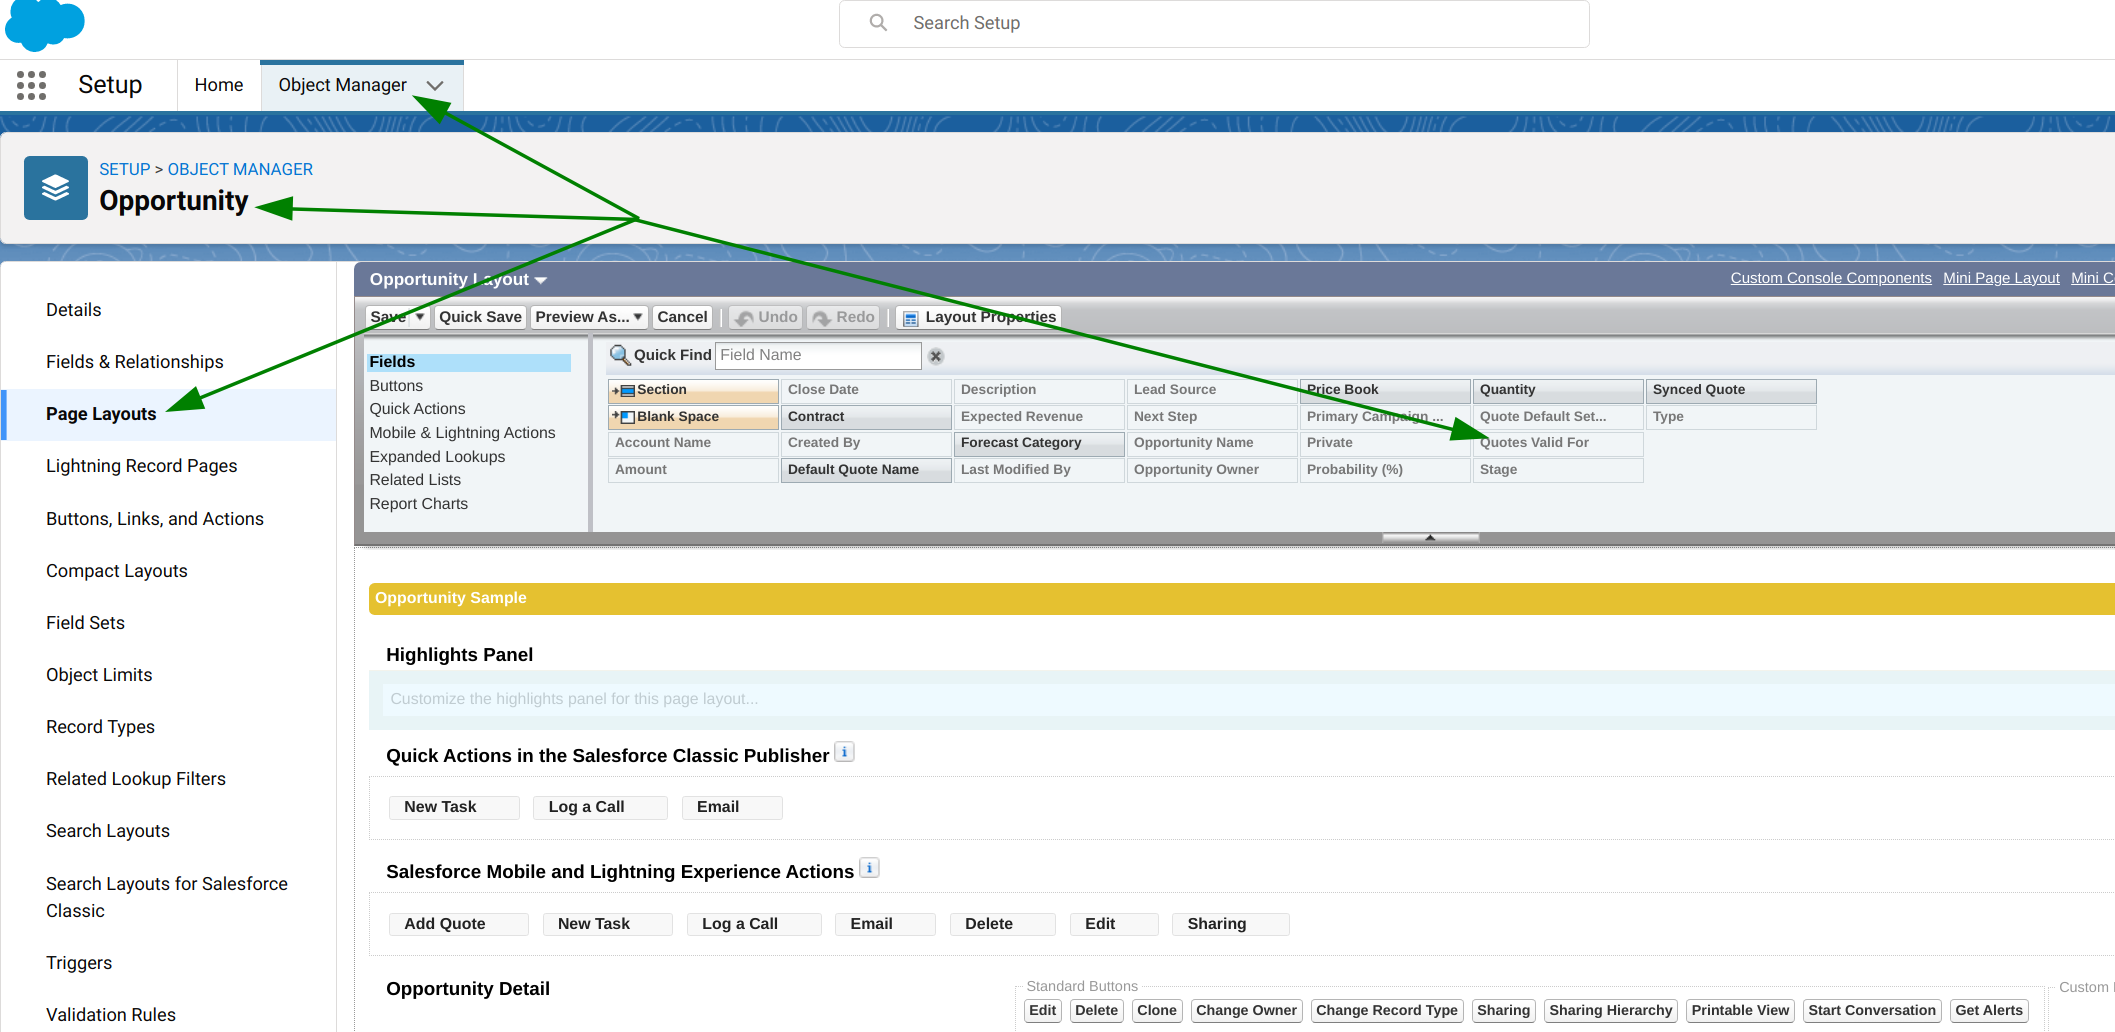
To provide access to the Quick Add Quote process, you need to place the Add Quote button on the Opportunity page. Navigate to Setup->Object Manager->Opportunity->Page Layouts and click the layout that you would like to use.
This package only supports Lightning Experience, classic interface is not supported
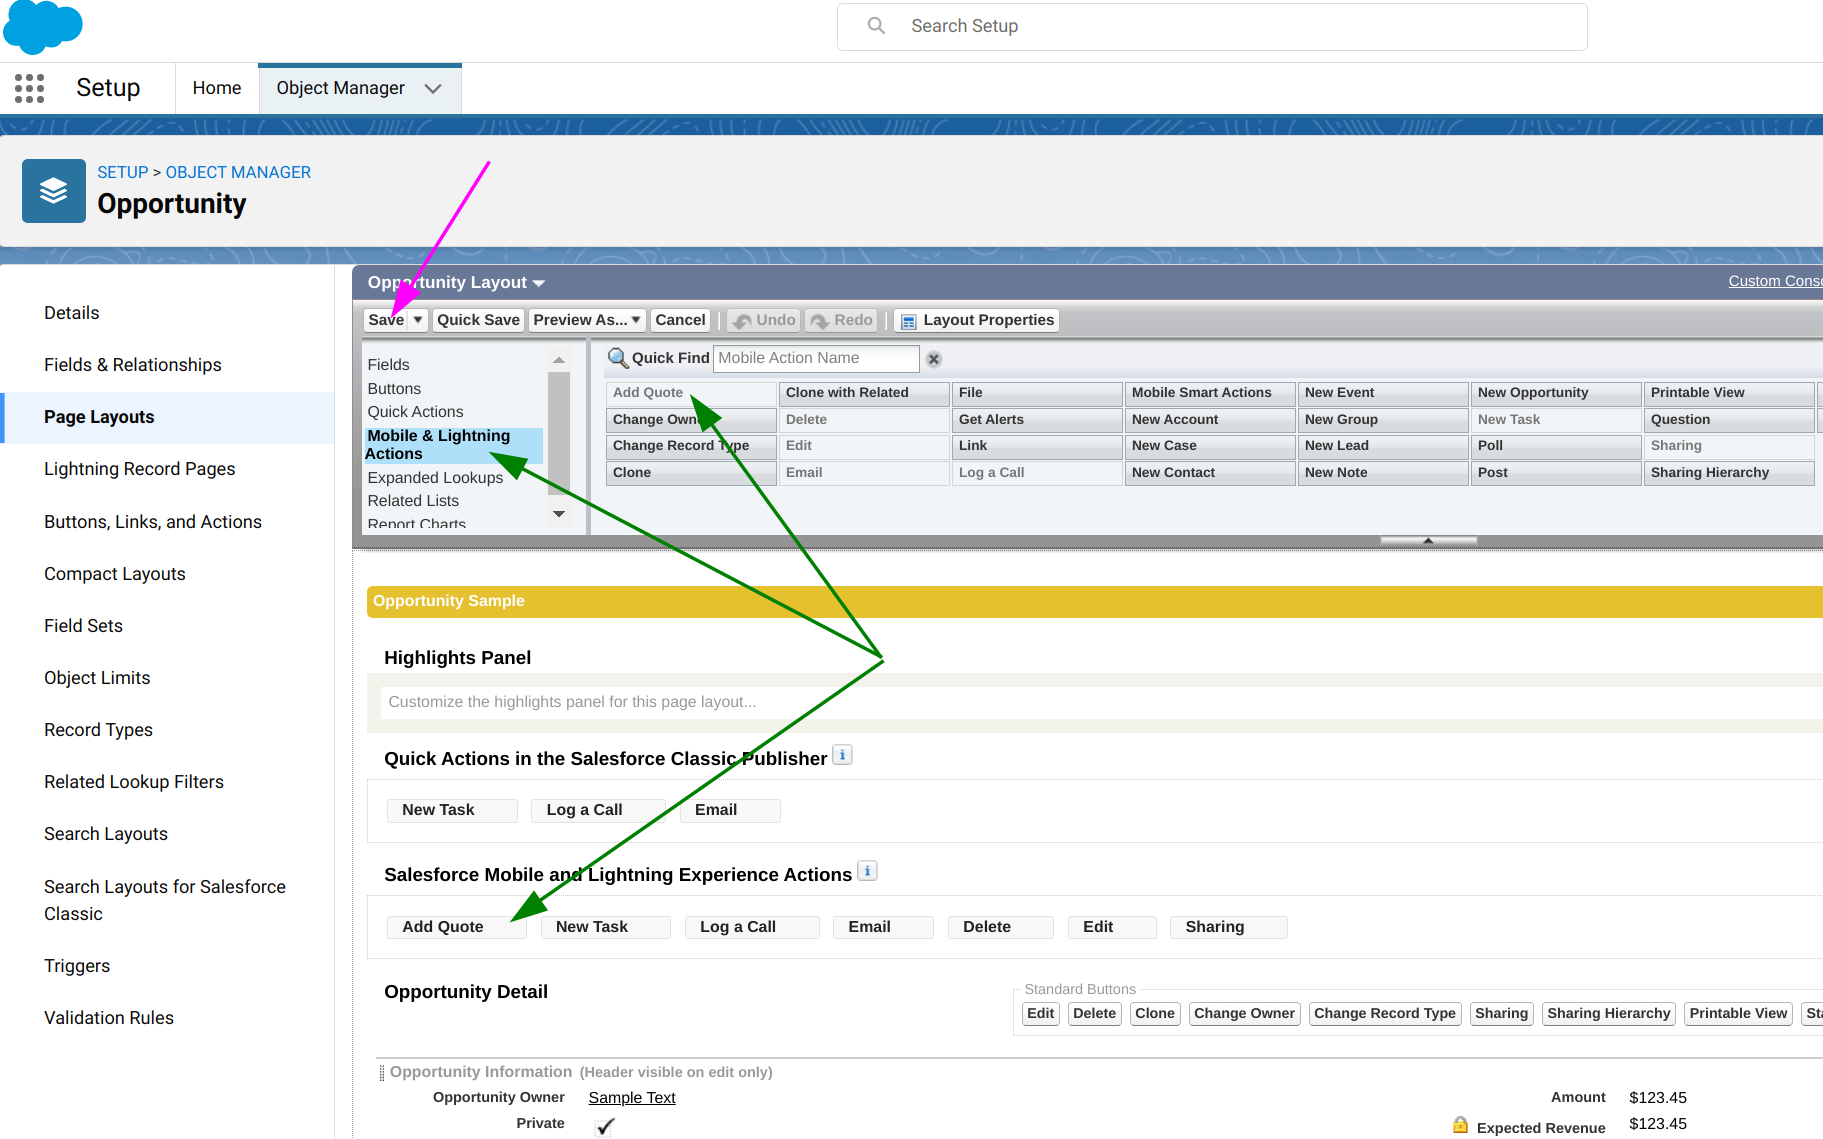
The page layout editor will open and you should select Mobile & Lightning Actions from the menu at the top. Locate and select the Add Quote button from the list on the right and then drag and drop it to the actions area on the page.
Adding Templates
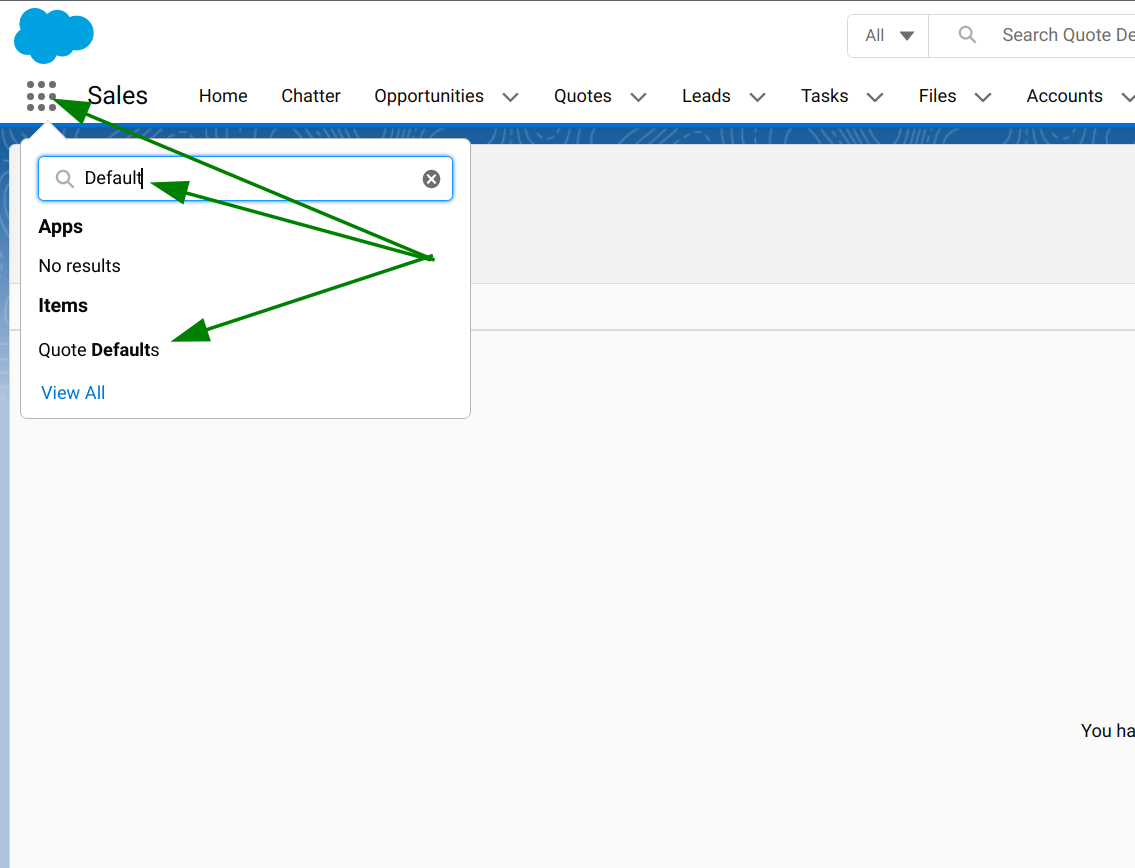
To configure product bundles you should navigate the Quote Defaults tab.
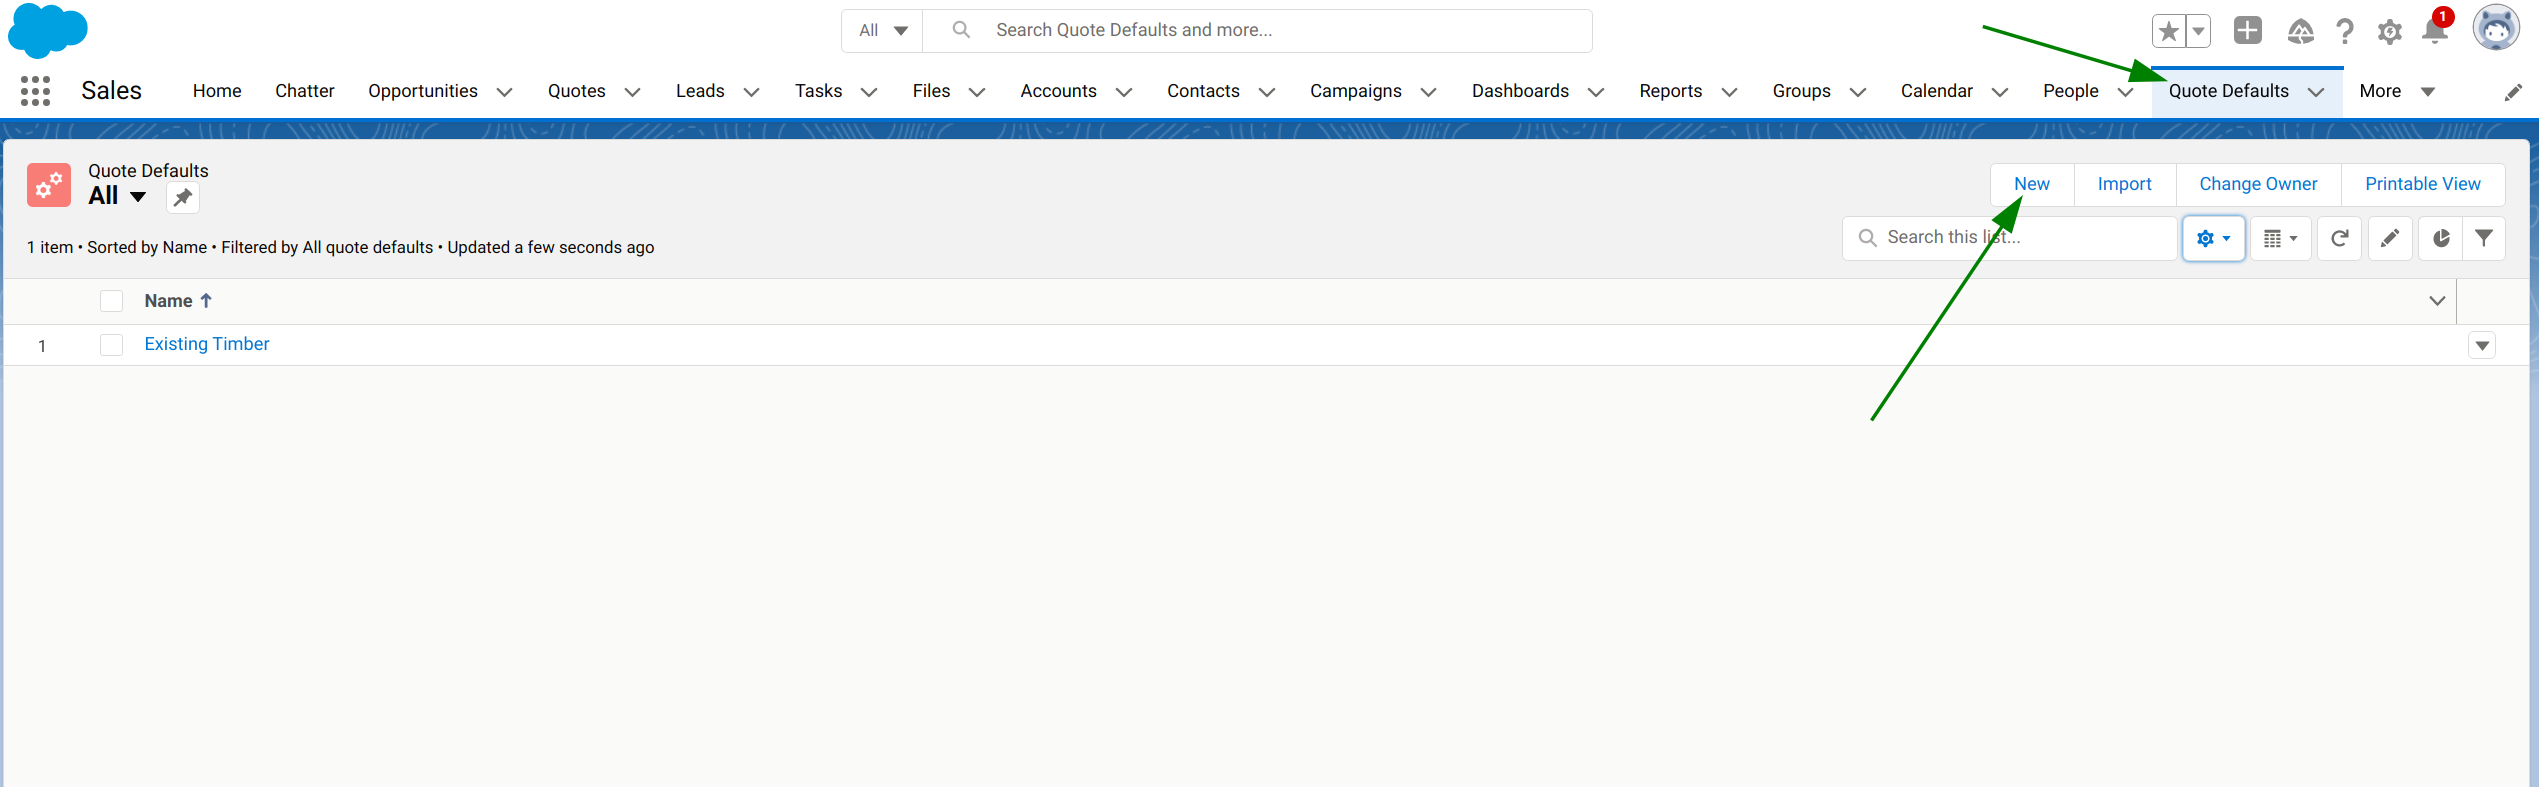
To create a new container for a product bundle press the new button on the Quote Defaults tab
You should mark the template active to make it avaliable to users
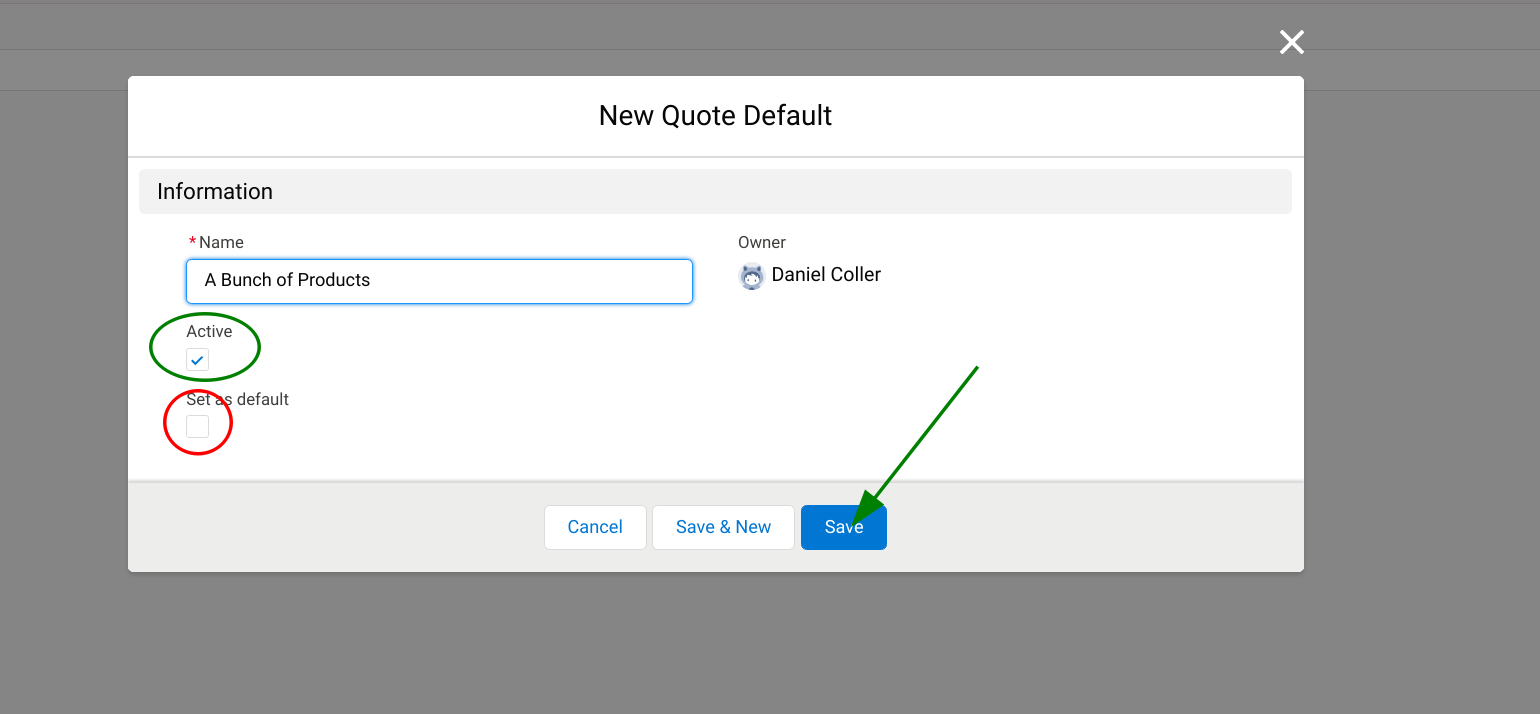
Checking the Set as Default box will make this template appear as the default selection each time the add quote button is pressed
Adding Products
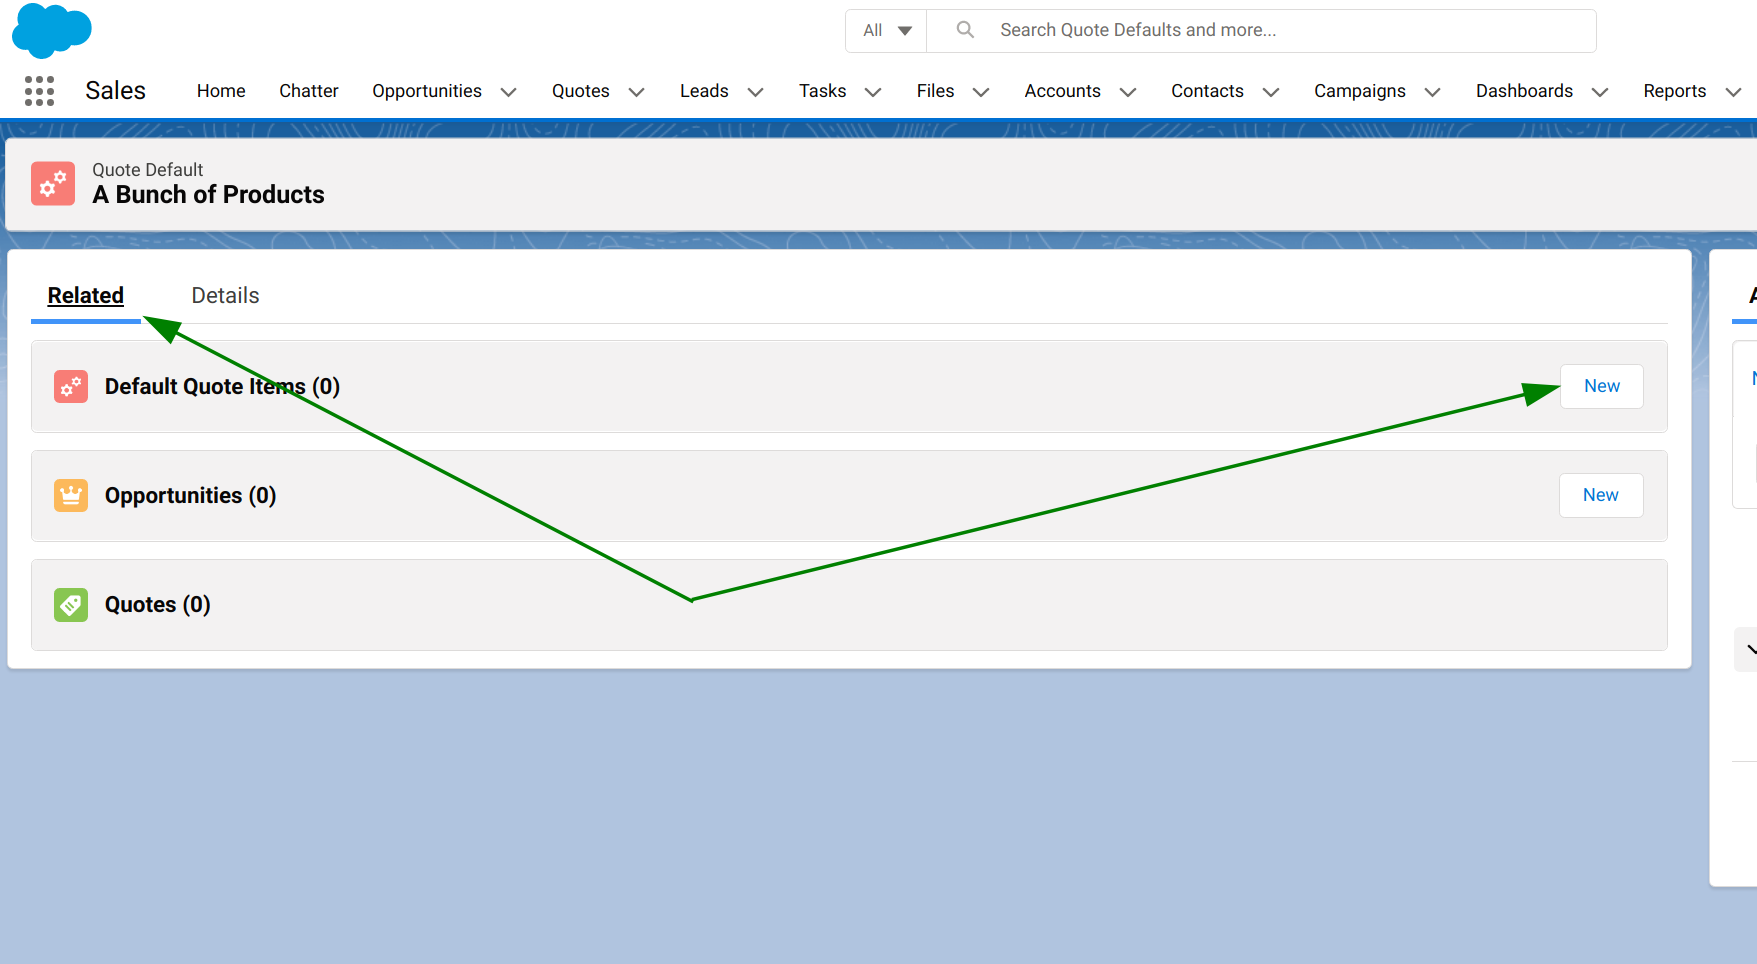
Once you have created a new container access the related list and add your products one at a time to the Default Quote Items list
In the item creation process you need to give the item a name and link it to the product that you want to add.
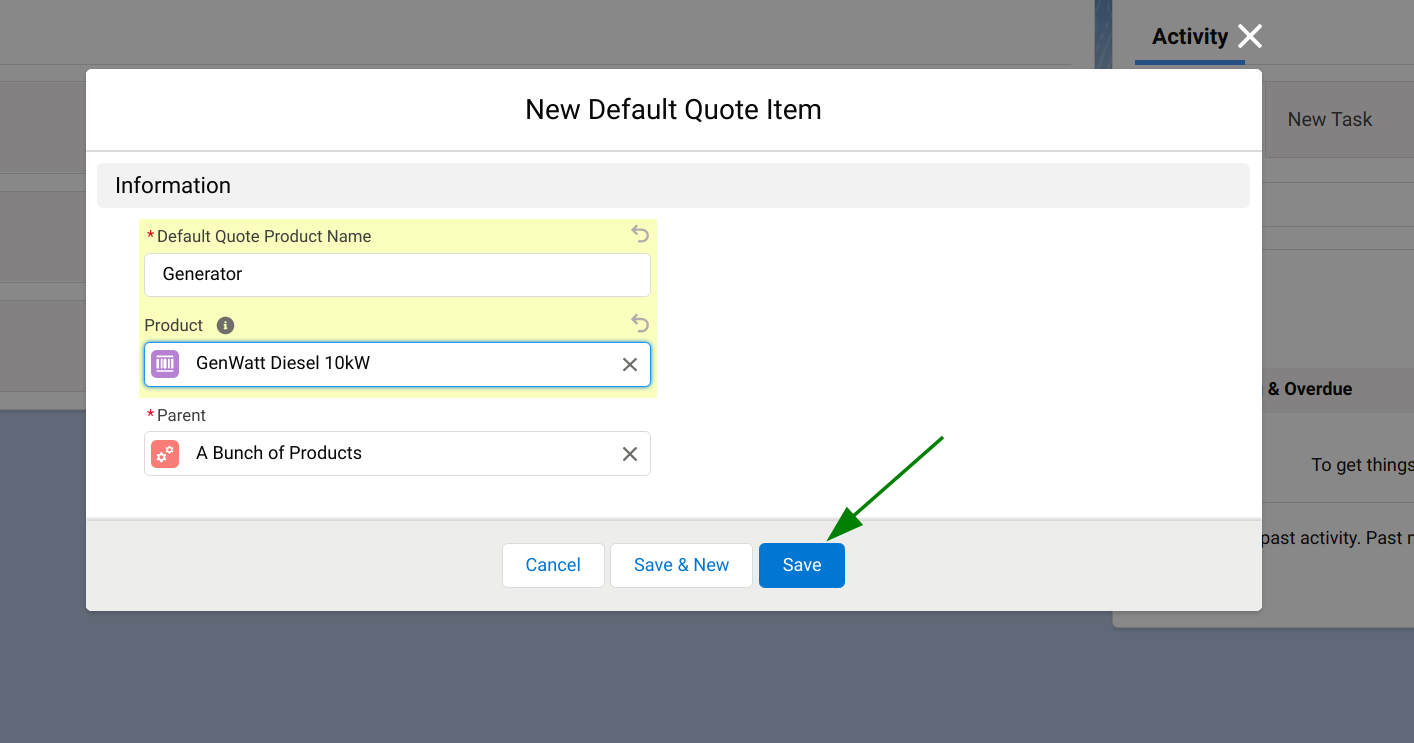
Once you have added all of your products you are done! You can move on to the next template if you have more to add.
Default Quote Name
The Add Quote button will present the user with a default quote name that can be edited, during the quote creation process. The default quote name is based on the Opportunity name but can be redirected to any field on the opportunity if you prefer. You can create your own custom scheme using a formula field if there is nothing suitable available.
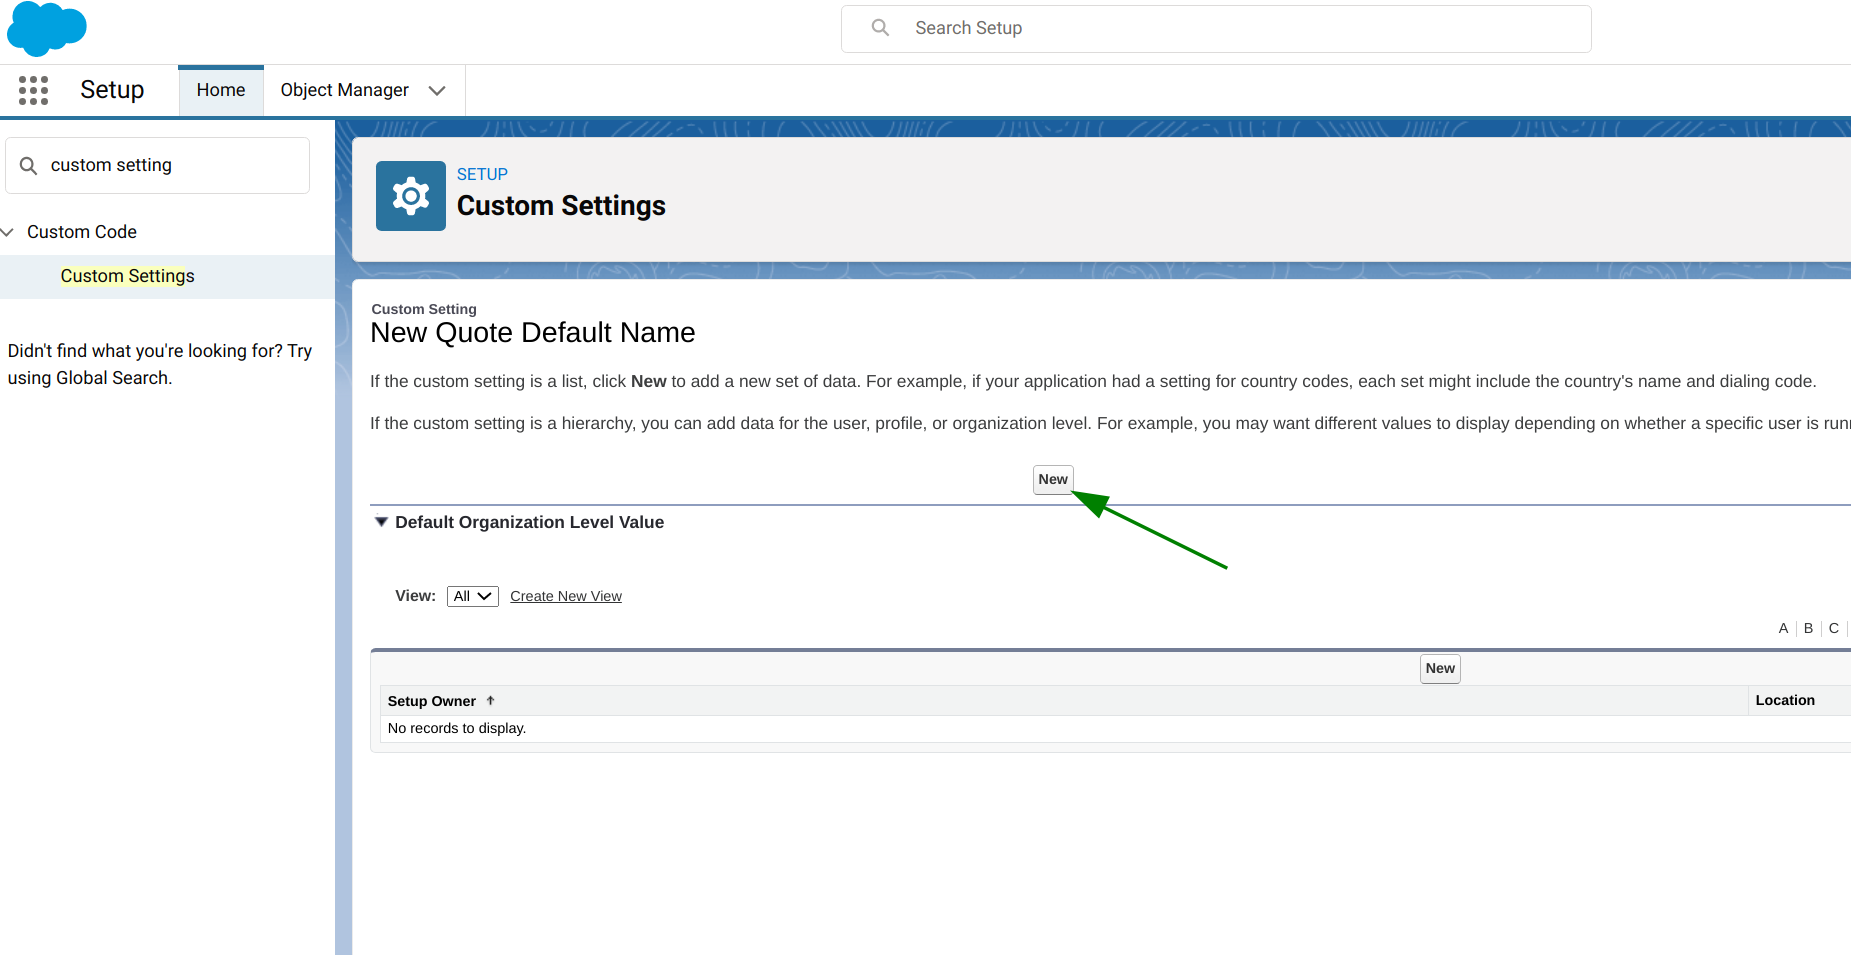
If you want to use something other than the opportunity name you should access the custom settings section of the setup. The app uses heirachy type settings, and the naming scheme can be configured org wide, per profile or at the per user level.
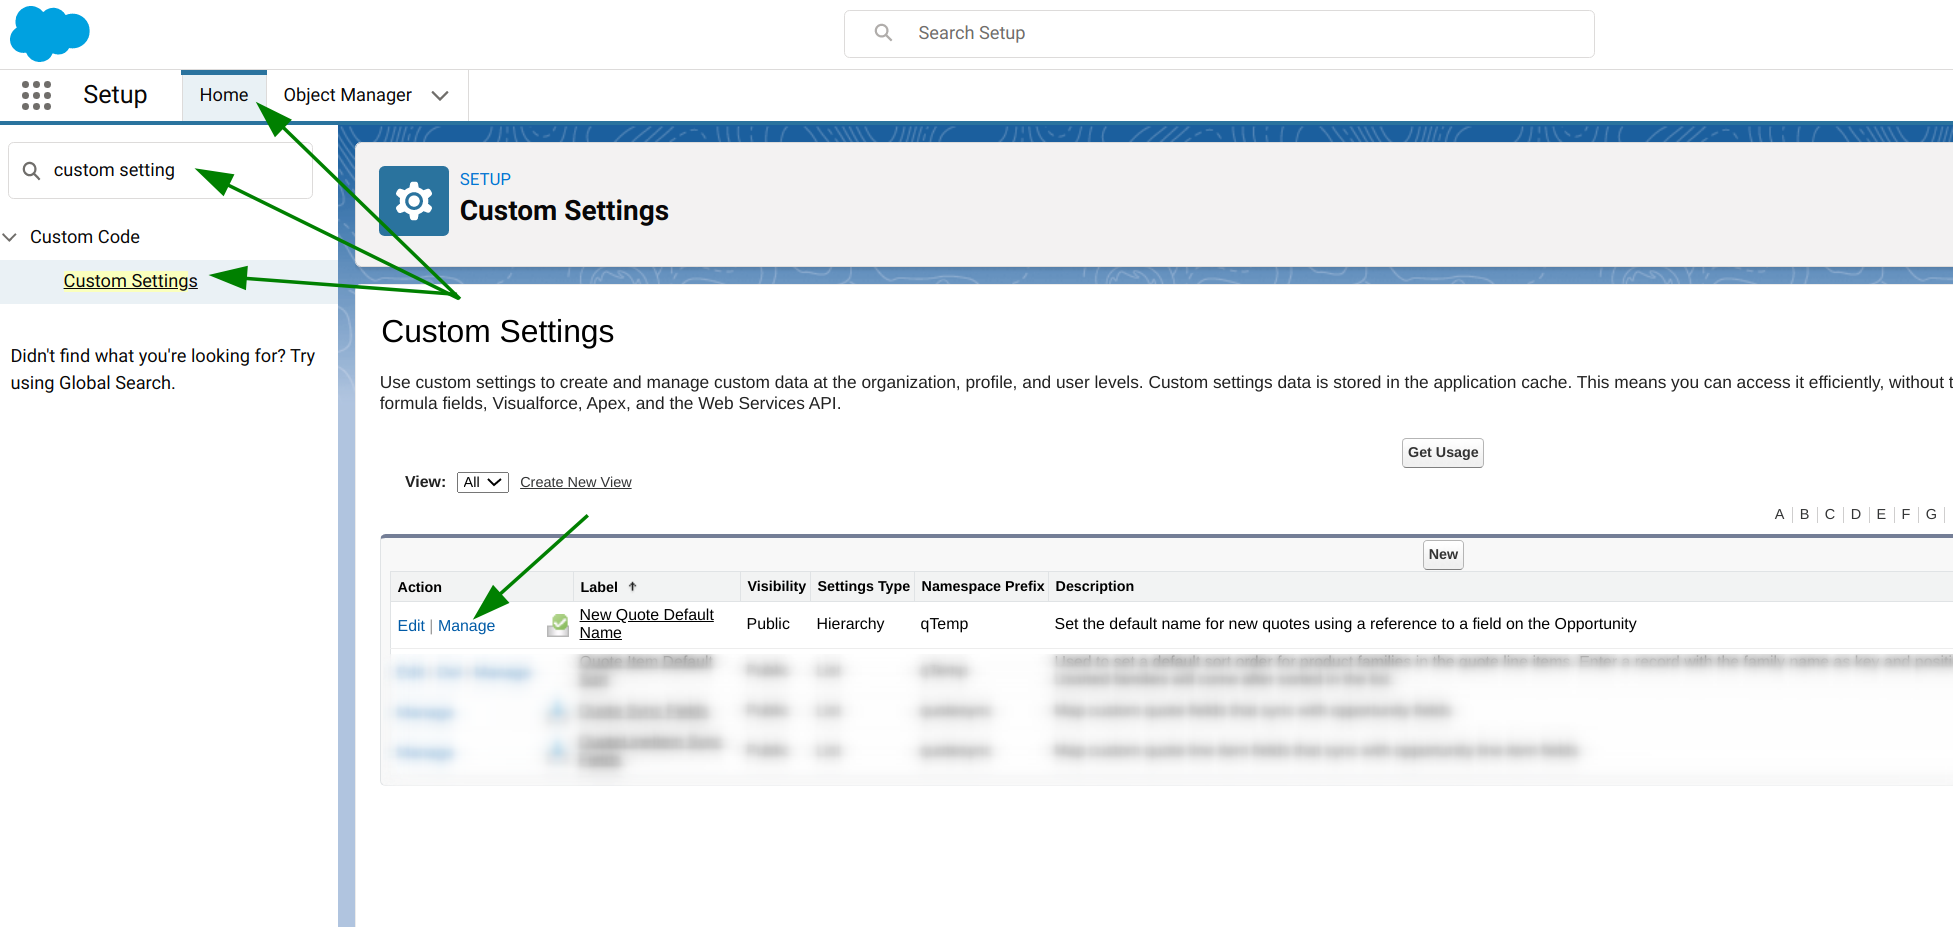
To start off you should configure an organisation wide setting. To do this press the new button near the top of the page.
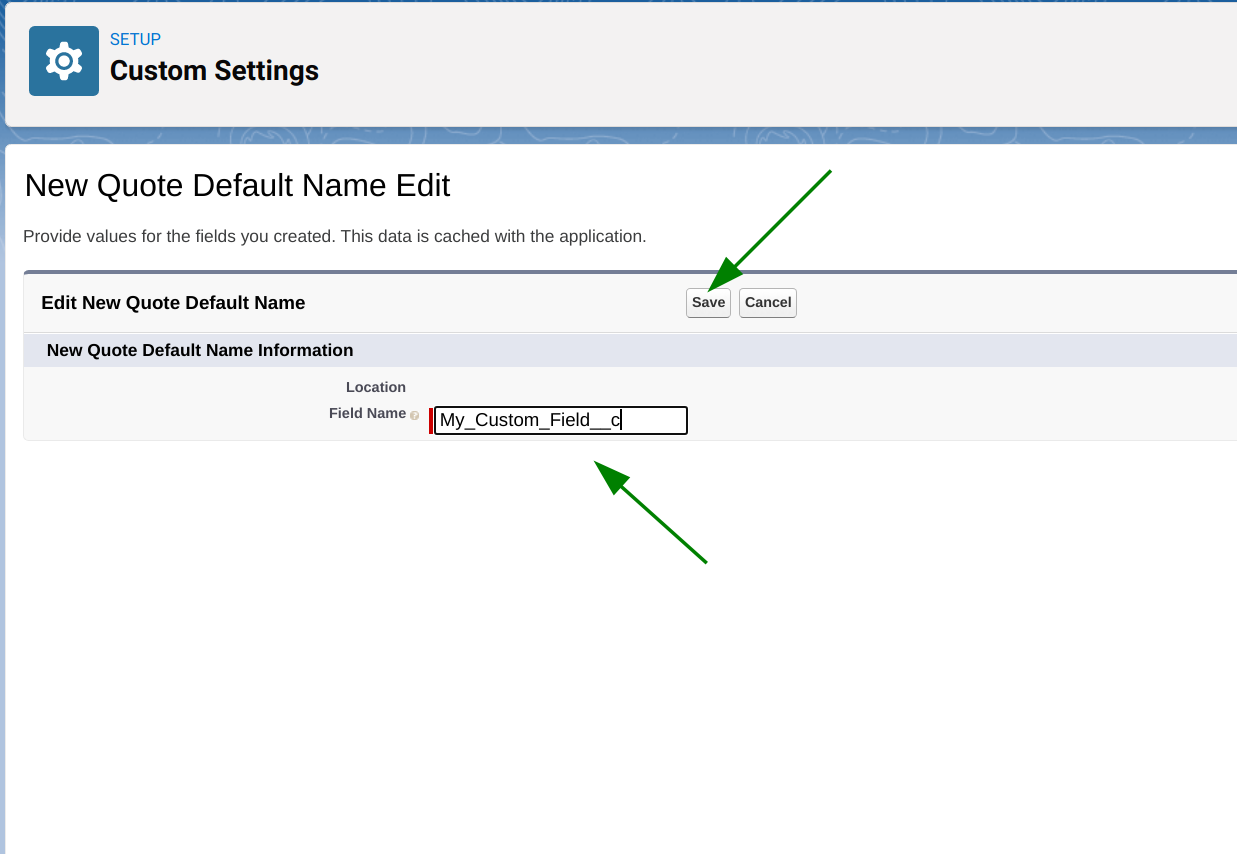
Enter the API name of the field the process should use and save the record
Per profile and per user records can then be created as required
Quote Expiry Date
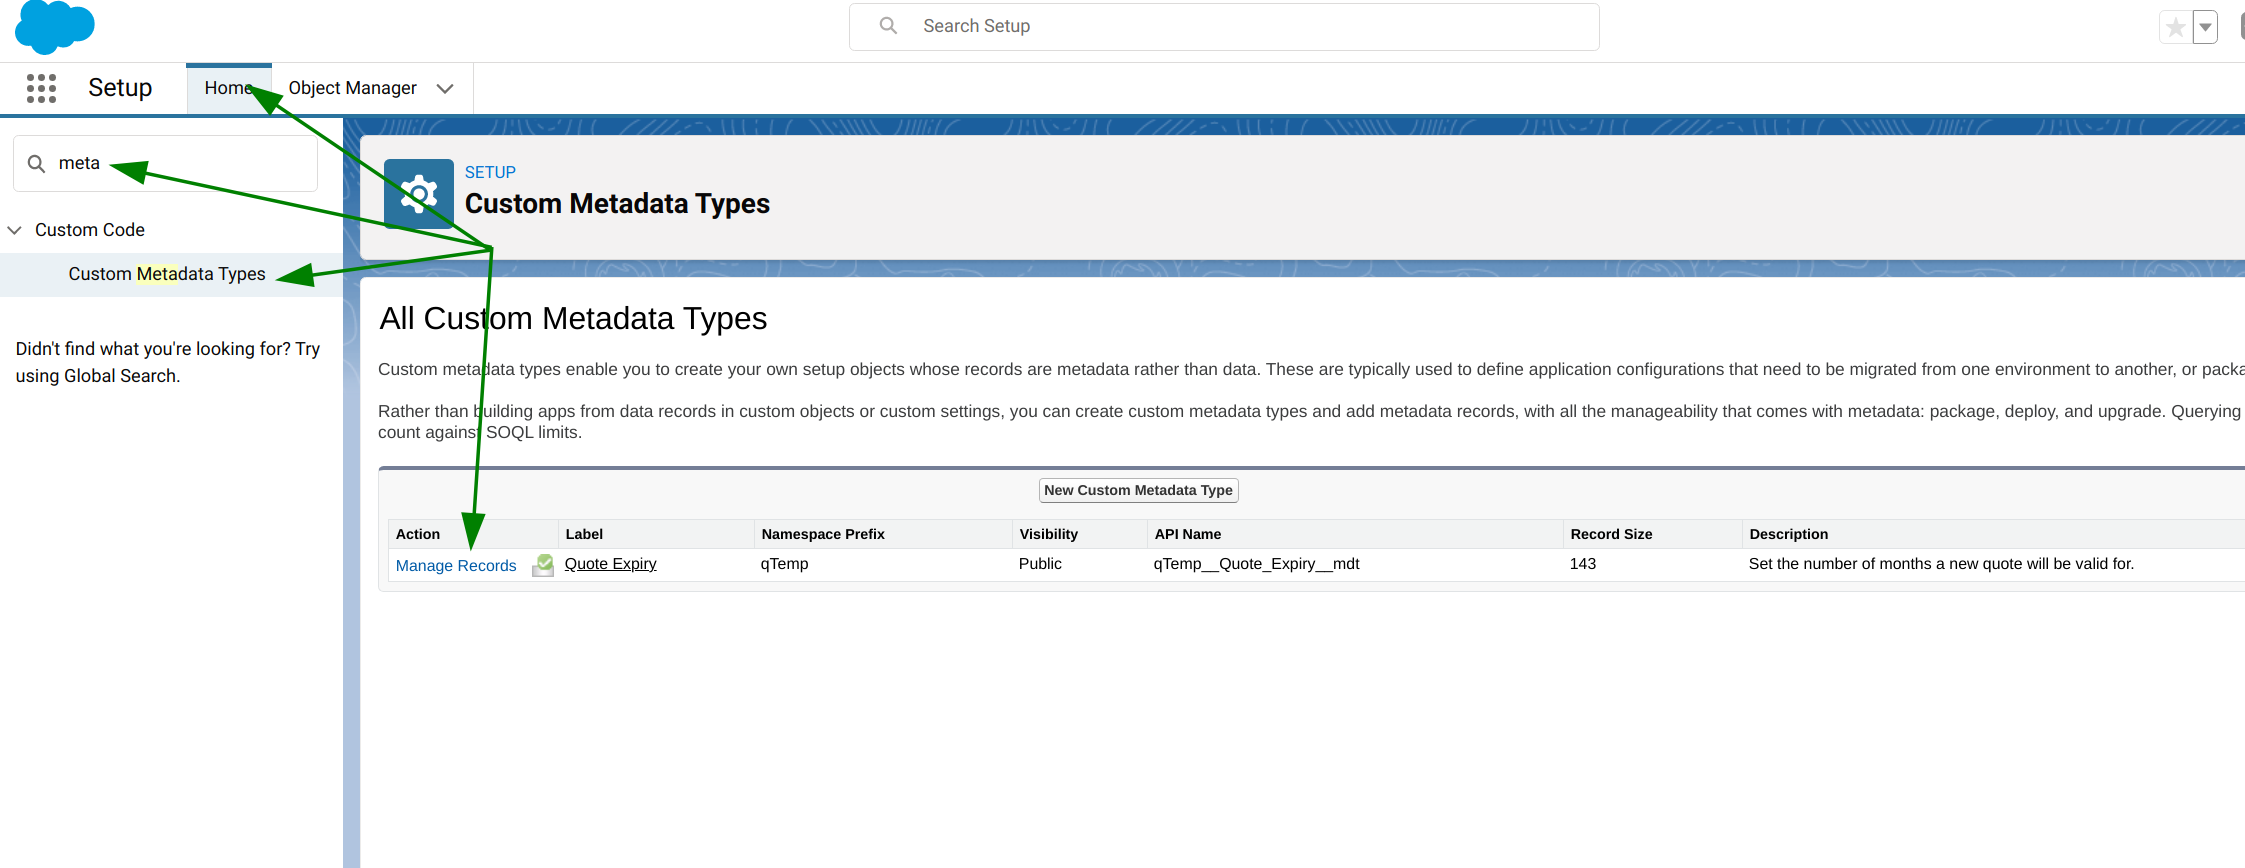
The app will set the expiry date for all quotes to 3 months in the future by default. This can be changed in the custom metadatatypes section of the setup.
Navigate to the custom metadatatypes and select Manage Records on the Quote Expiry entry
Click edit next to the *Default record
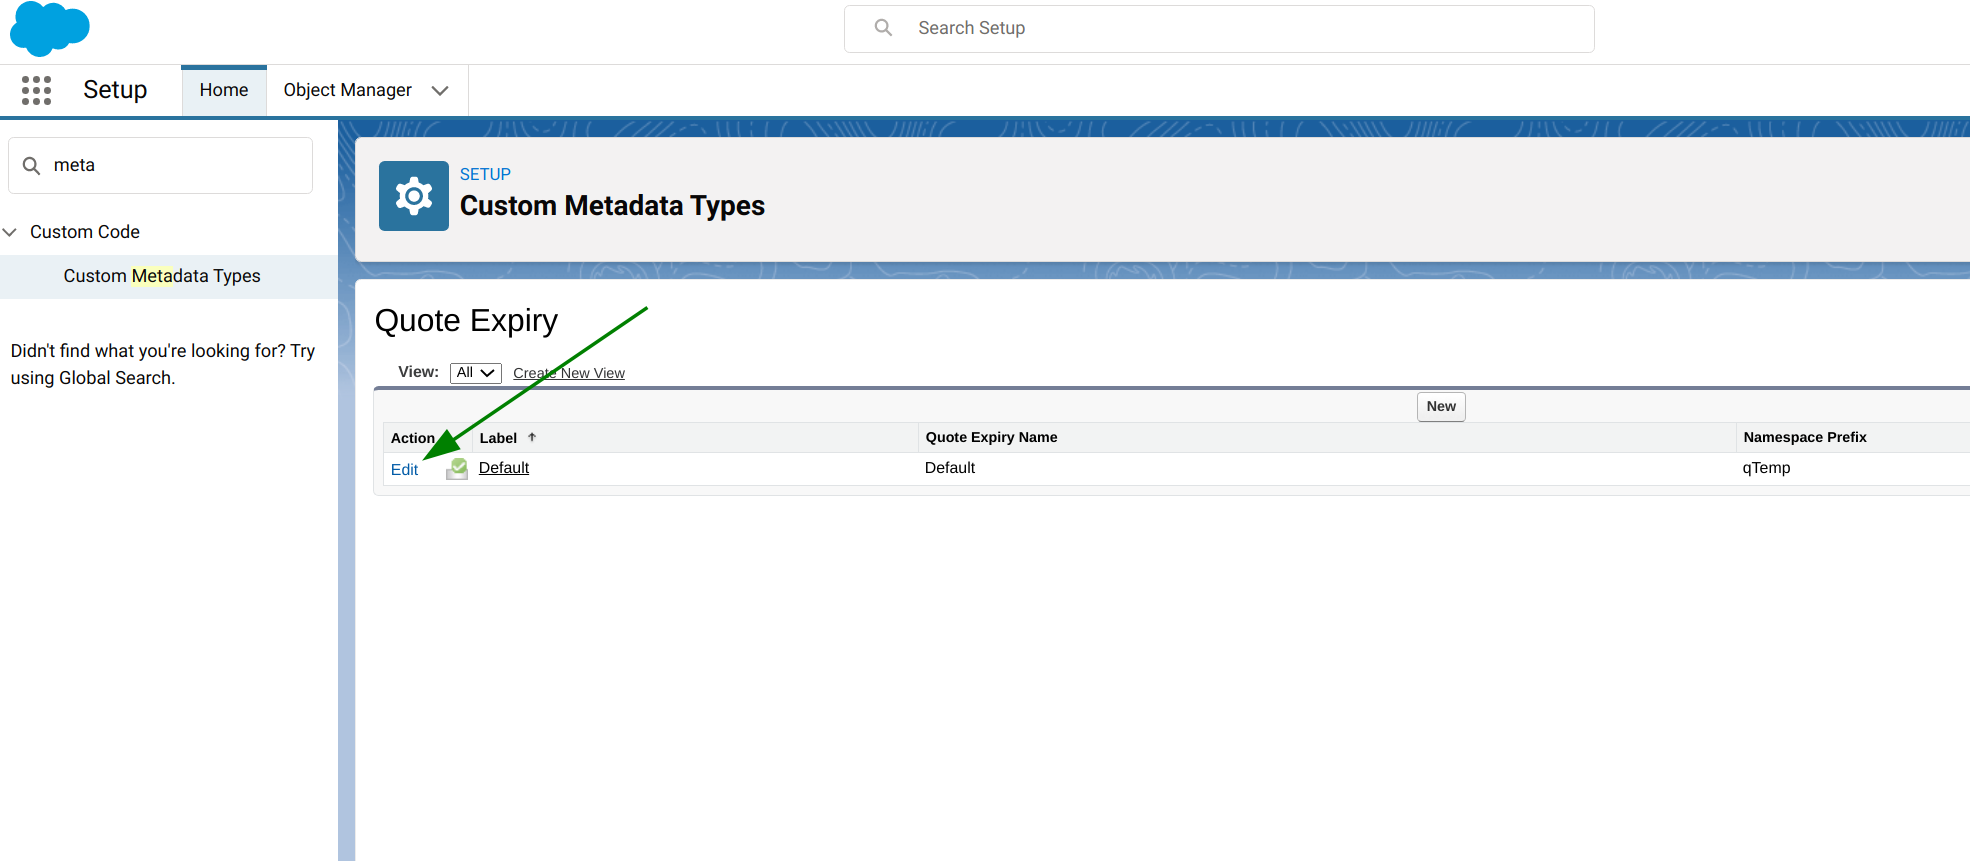
Change the period to the number of months that is appropriate for your Org.
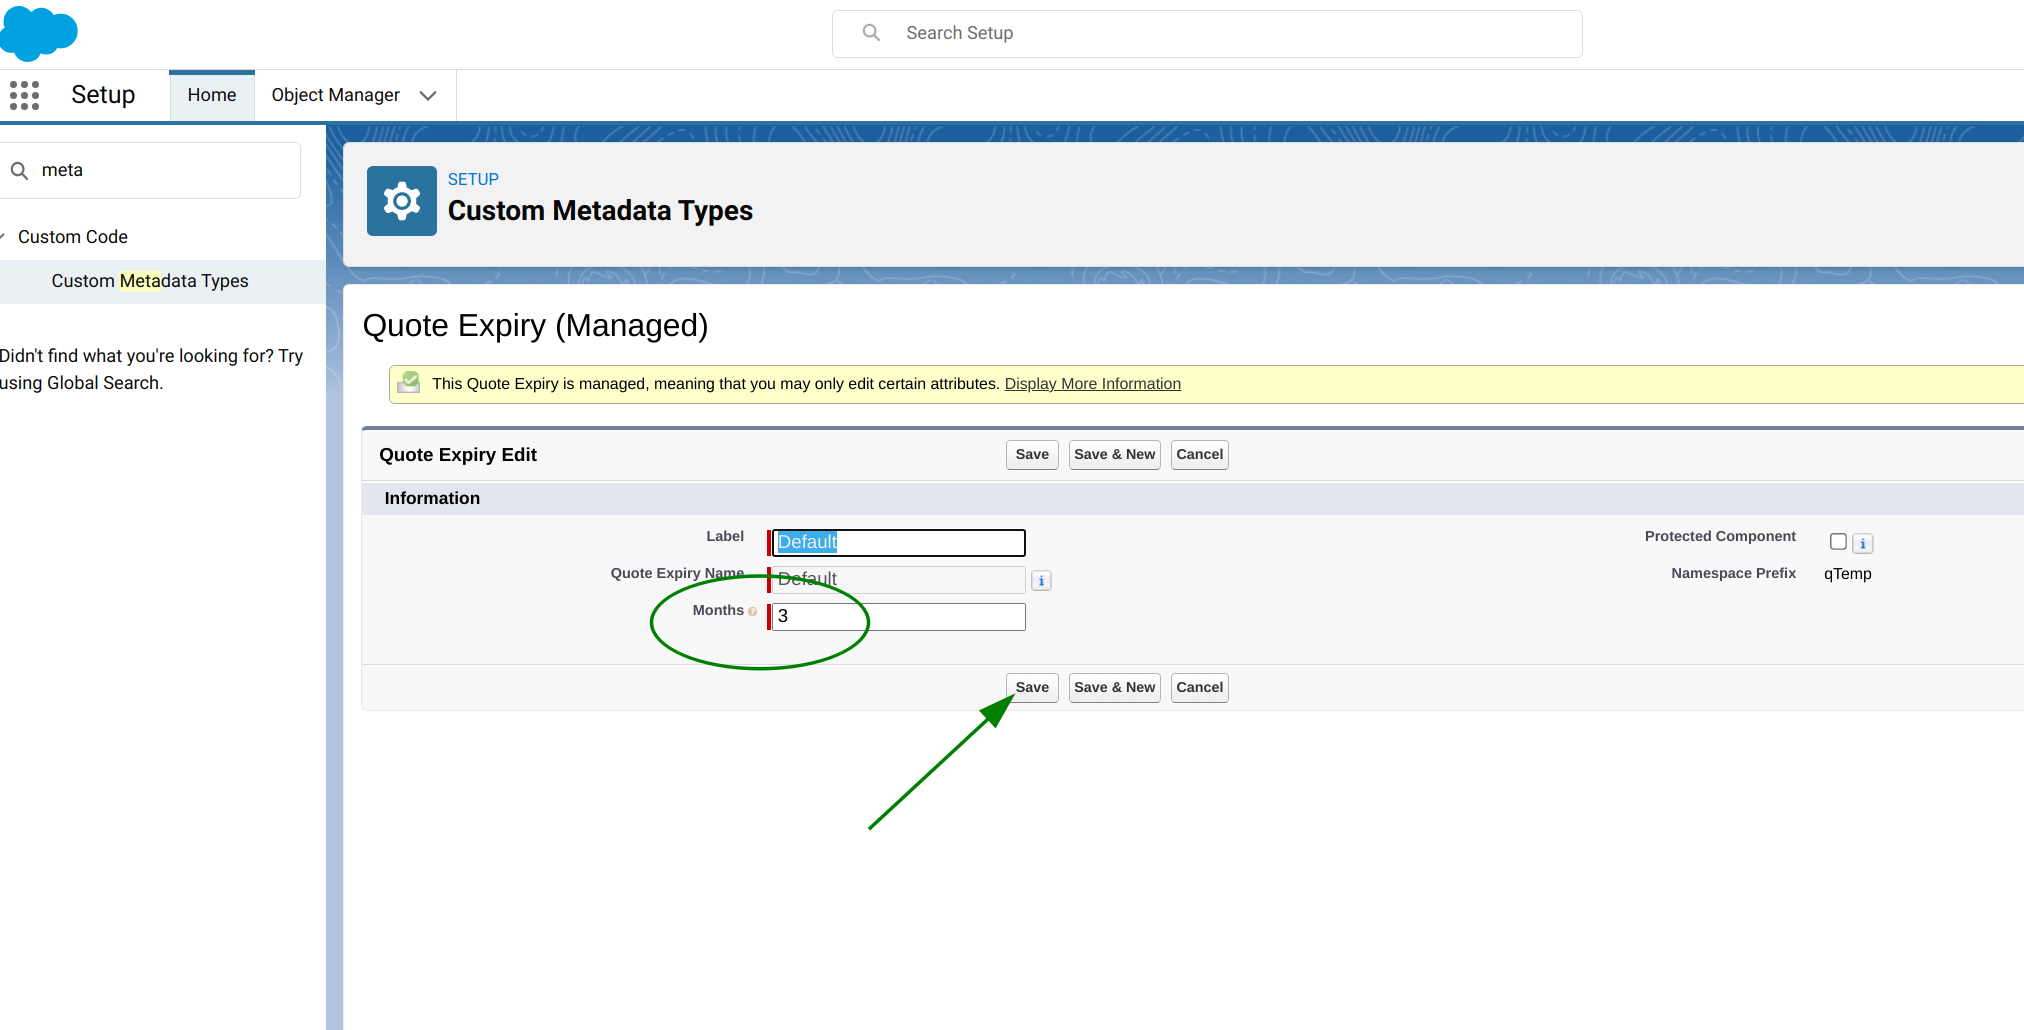
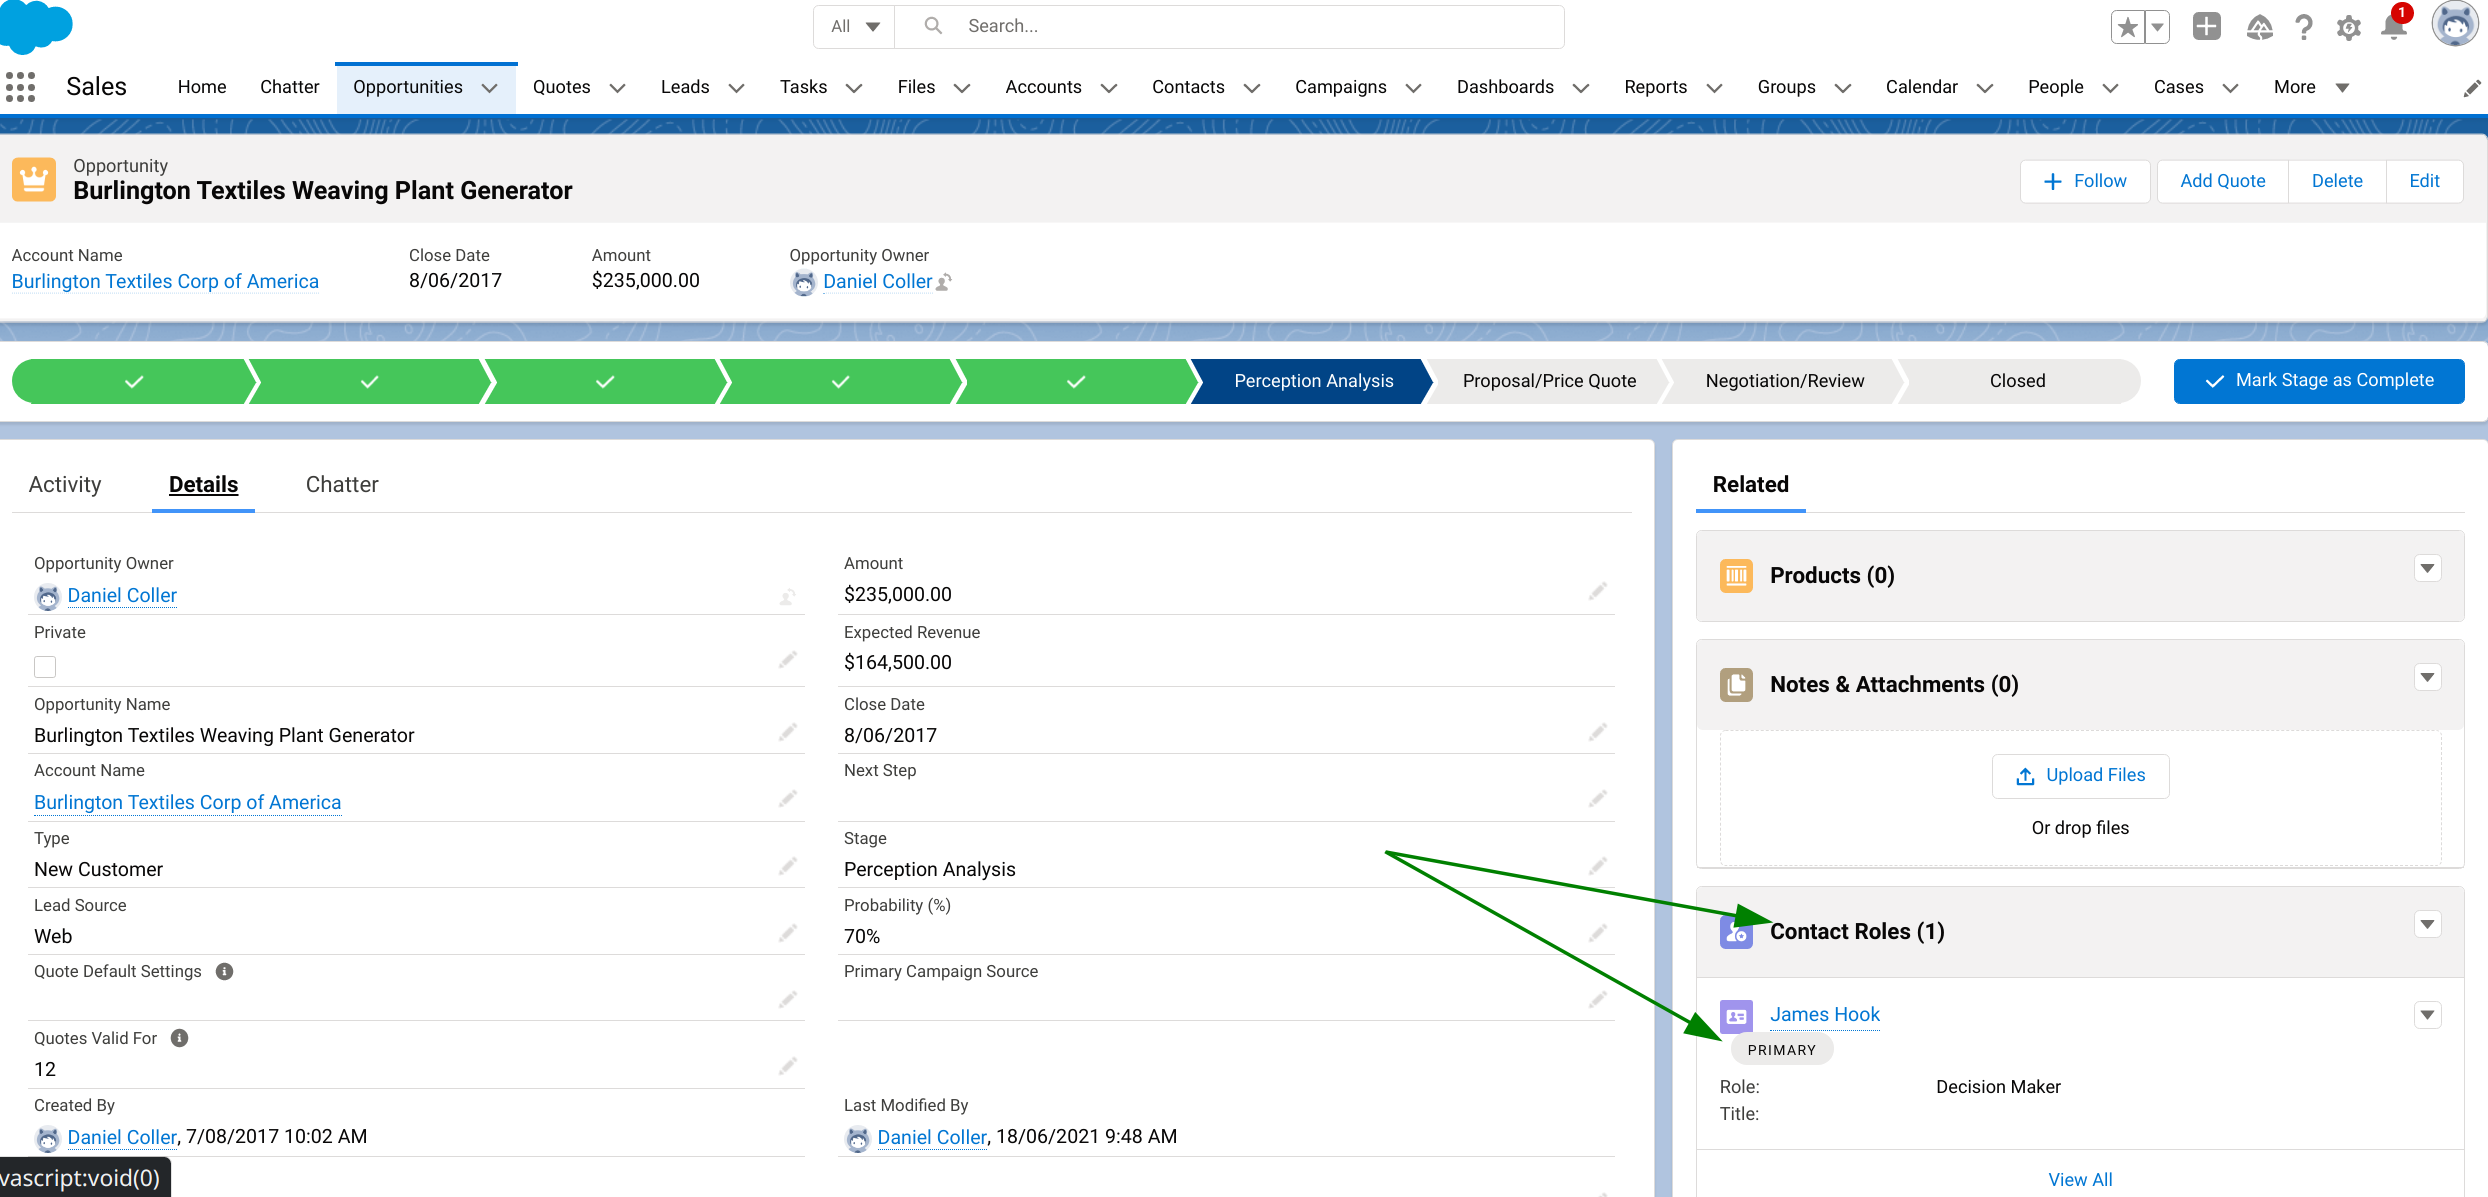
The app also adds field to the opportunity object (qTemp.Quotes_Valid_For__c) that the admin can place on the page layout if required. This field will allow for overriding the default on a per opportunity basis.
Quote Contact
The default quote contact (Quote prepared for field) is taken from the Primary Contact on the Opportunity. If the Opportunity does not have a primary contact set the Add Quote process will nag the user a little when it doesn't find it. The primary contact is set using opportunity contact roles
If you would like to simplify the management of the primary contact on an Opportunity check out our other App Opportunity Contact Roles that adds a lookup field on the Opportunity details page and auto creates a primary contact when it is populated
User Permissions
It is the administrators responisibility to ensure users have access to the objects and fields required.