Variations User Guide
How to create a variation for additional stock/quantity
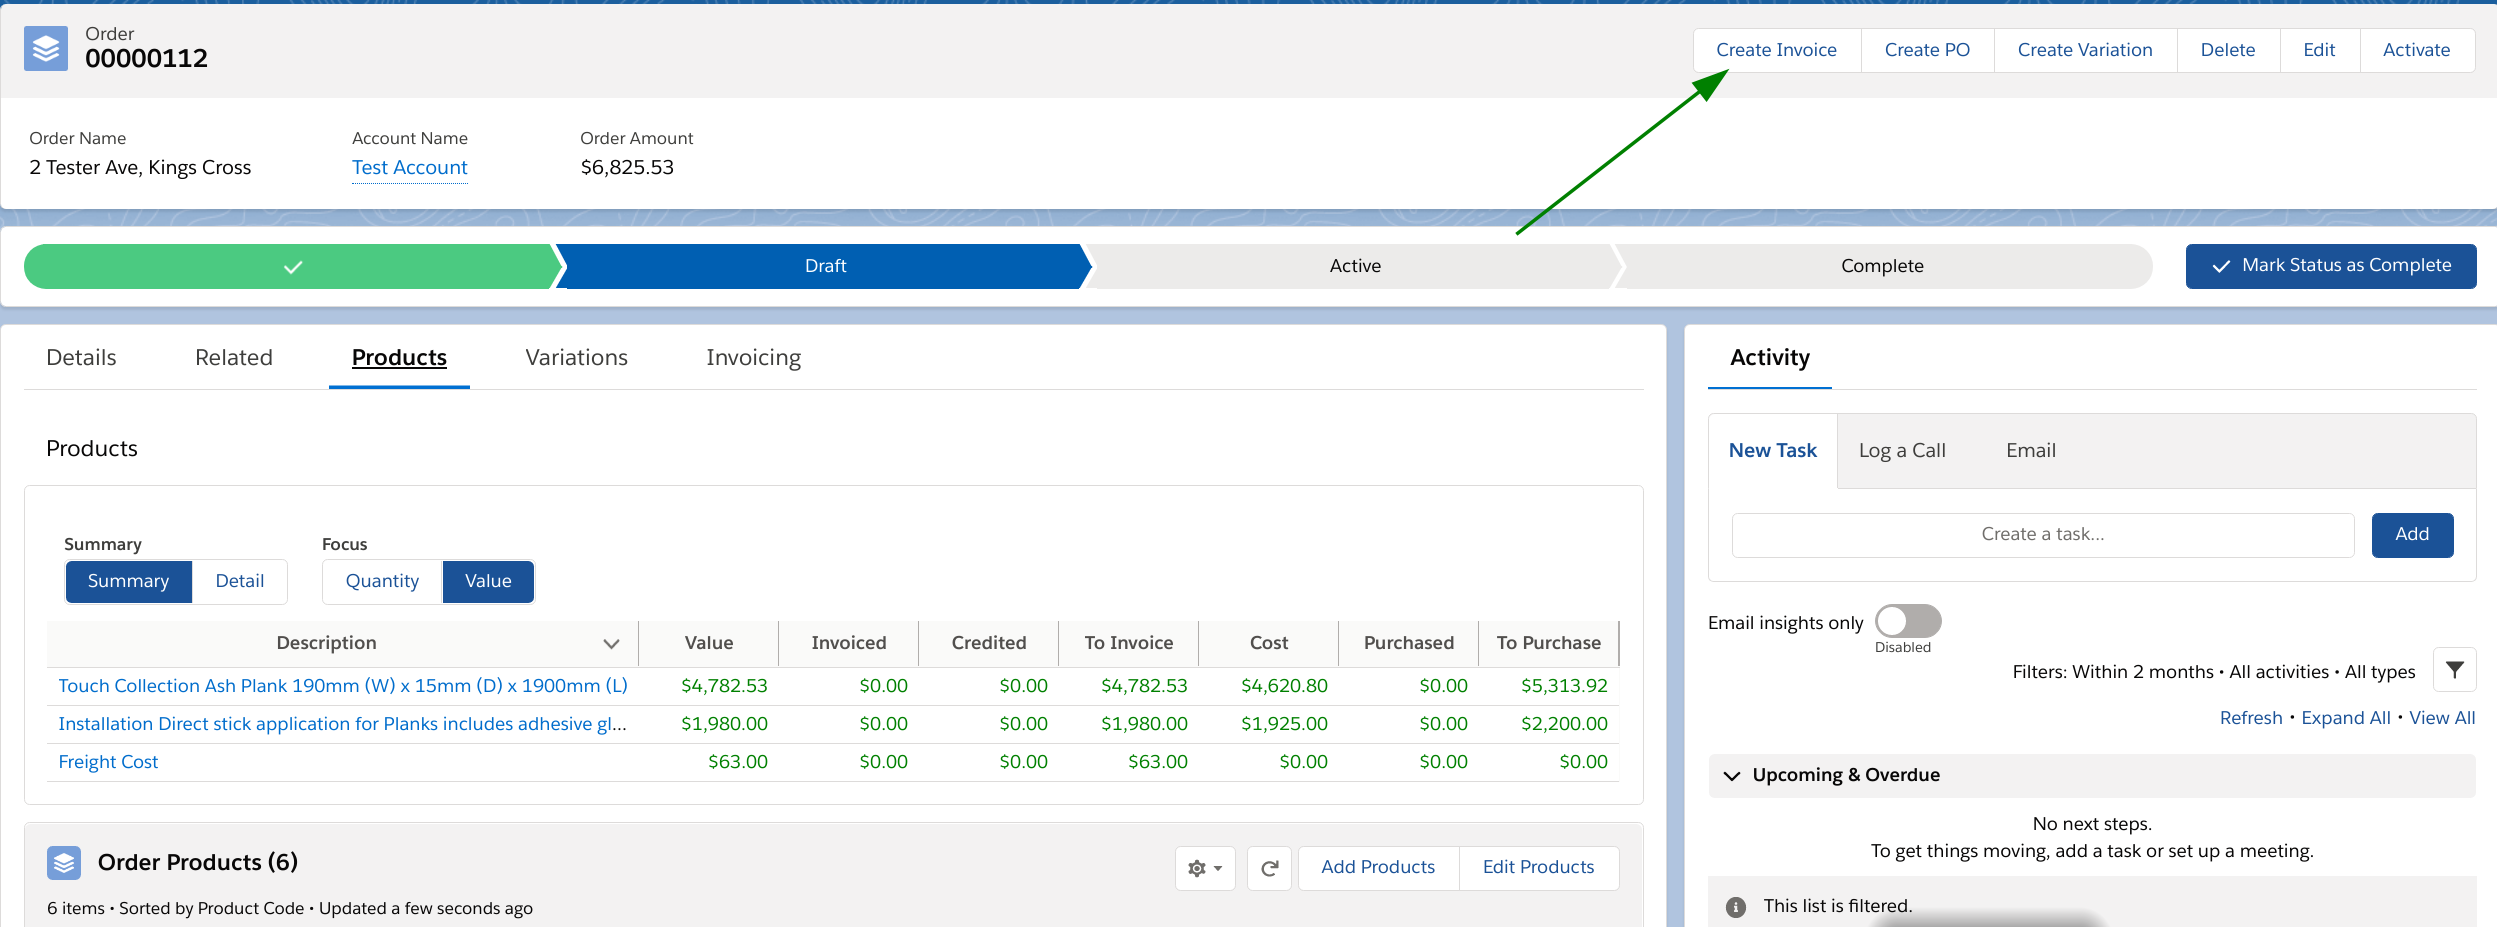
To add to an existing order you should start by navigating to the order page for the order you need to vary and press the Create Variation Button

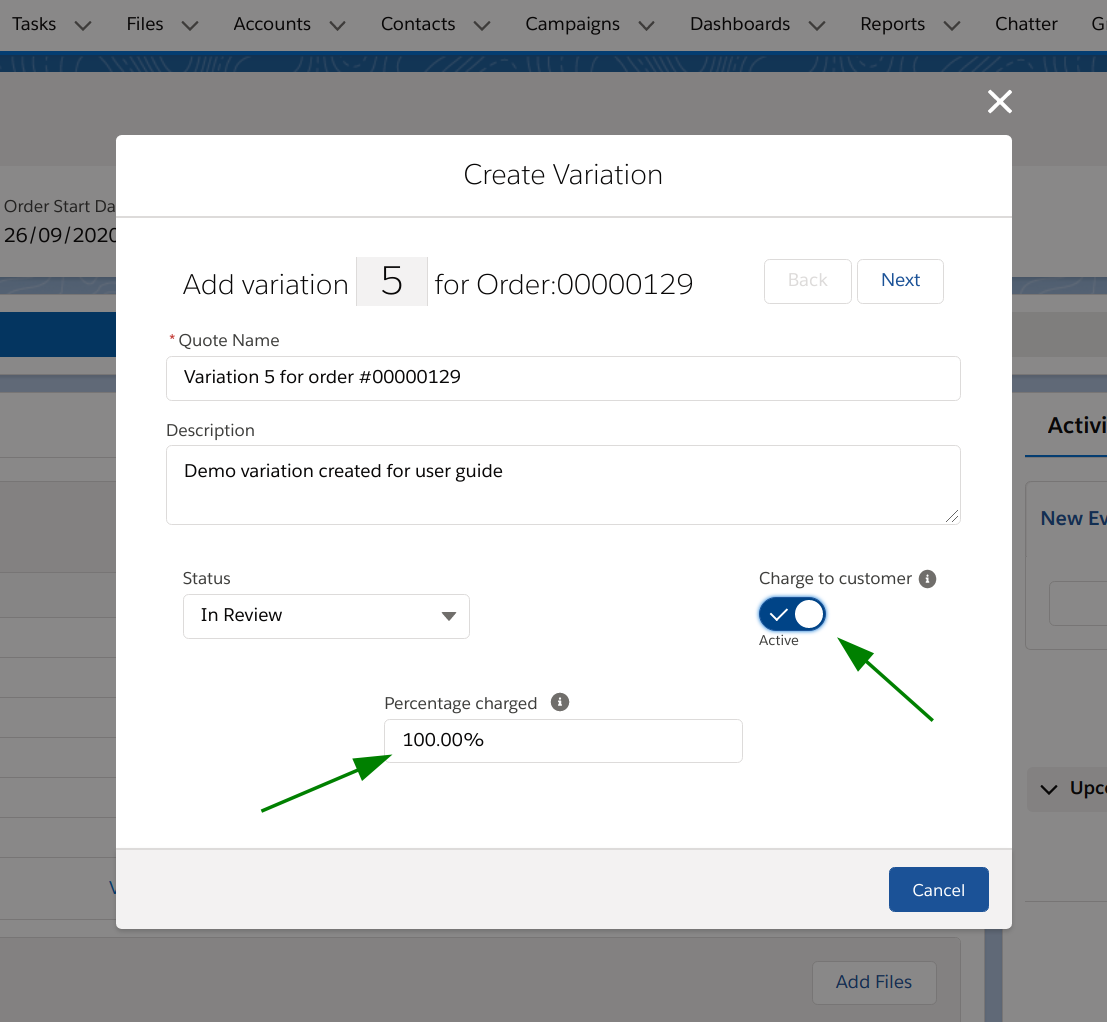
When the Create Variation window opens you are prompted to set the name, description, status and pecentage charged to the customer.
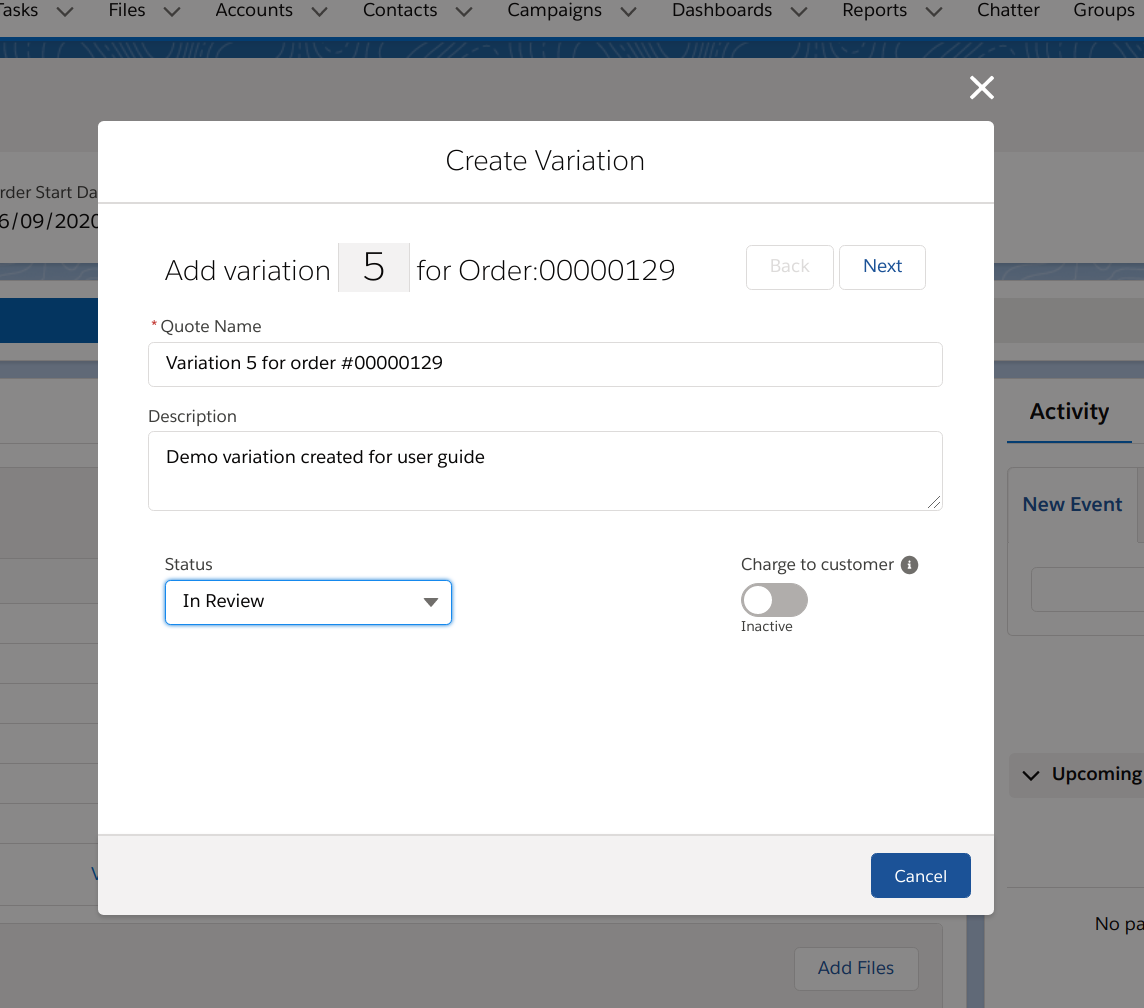
Name This is prepopulated by default but can be over-ridden if required
Description A detailed description of the variation and the reason for the variation
Status The status of the new variation when it is created
Pecentage Charged This value is used to set a discount on the line items when creating the variation. When creating line items the system will use the sales price of the original item to set the price of the variation. The percentage discount value is inversely proportional to the percentage charged value. If the percentage charged is set to 100% the discount is 0%, if the percent charged is 0% the discount is set to 100%.
The variation number can be set (or re-set) on the Order Details page if required. Look for the field called Next Variation
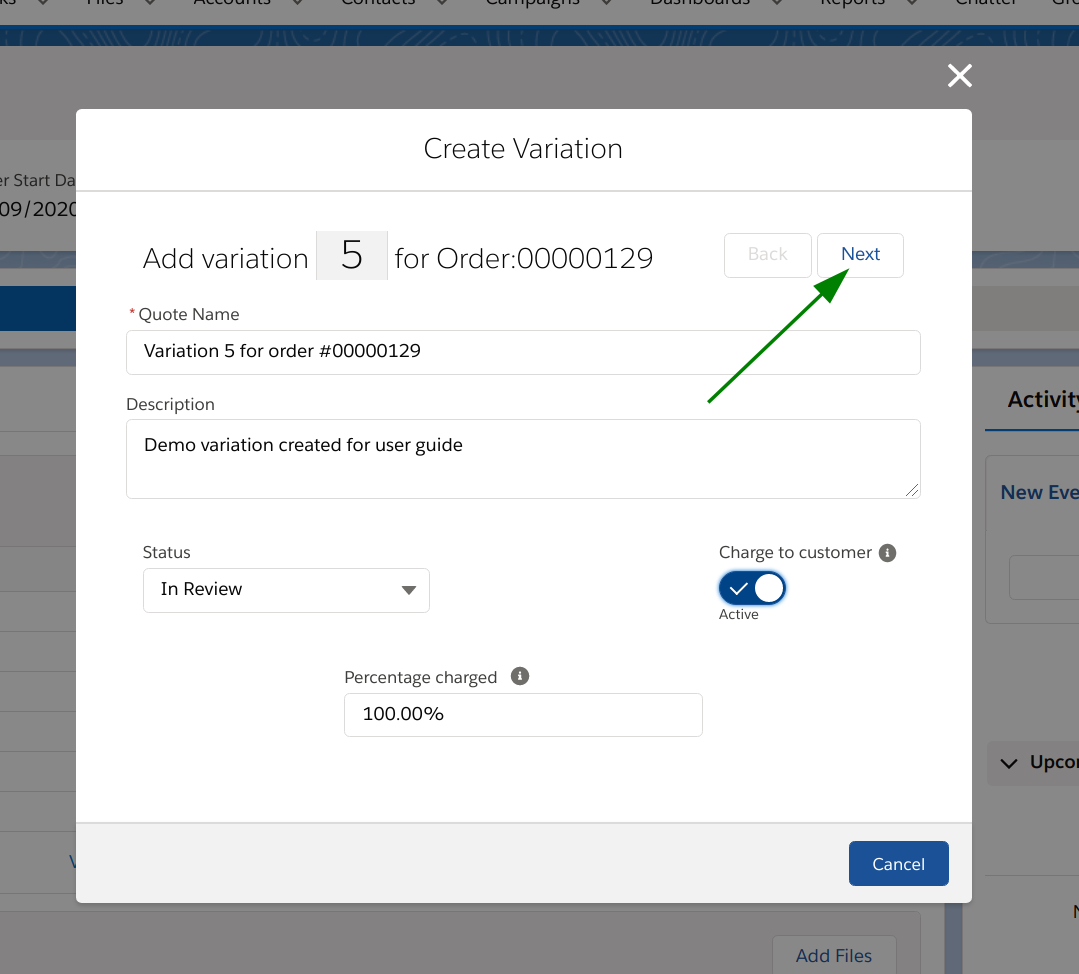
Once all values have been set as required press the Next button to proceed
Select the product(s) that will be varied from the list of products in the order. Note that existing variations are not shown in this list, if you need to vary a product that is itself a variation you should select the original order product again and create a second variation for that product
If you need to add new products that are not in the existing order this can be done after the variation has been created
If you are trying to add a new product without changing any existing products in your order you should still select a product from the list and then delete it once the variation has been created
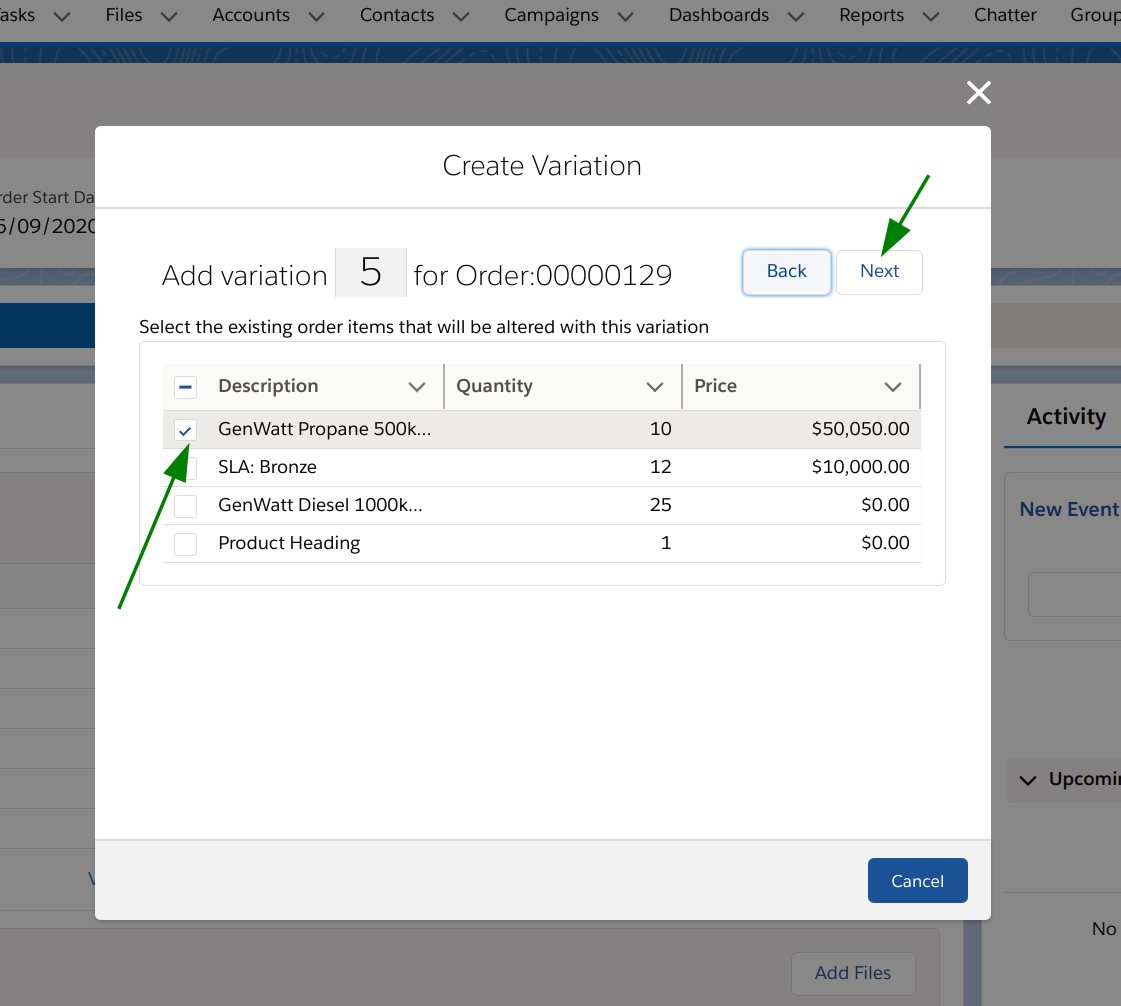
Once you have selected all products to be varied press the Next button to proceed
On the final stage of the creation process you should review your selections and press the Create Variation button when you are happy with your choices
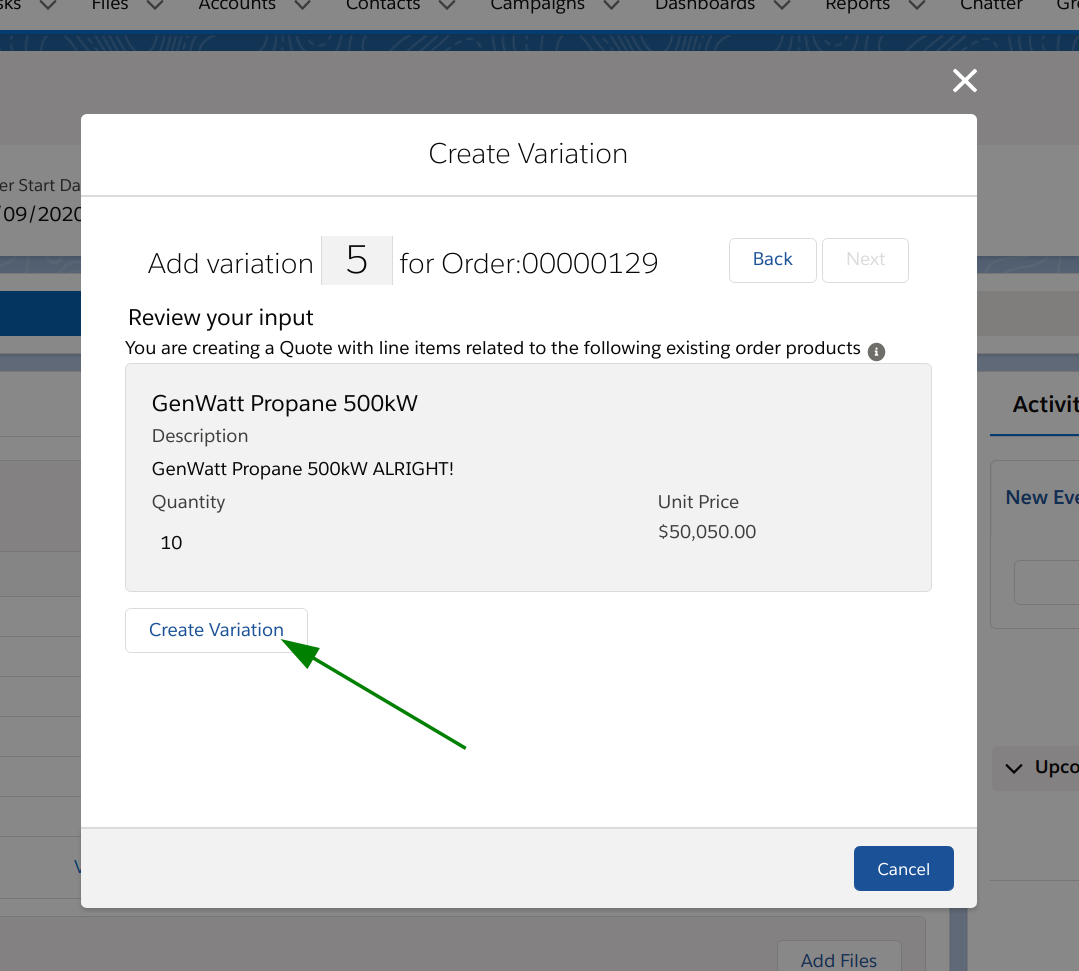
When the button is pressed the creation process will run and a new quote will be ceated as a variation to your selected order. Your browser should automatically navigate to the new record.
Your variation will have all of the products you selected during the creation process already added. You should check the quote line items related list (or your preferred custom method where it exists) to view and manage your variation items.
The default quantity of each variation line item is taken from the order product it varies as well as the price
In most circumstances you will want to edit at least the quantity and the description of each line item before you proceed. There are a number of options for how to do this
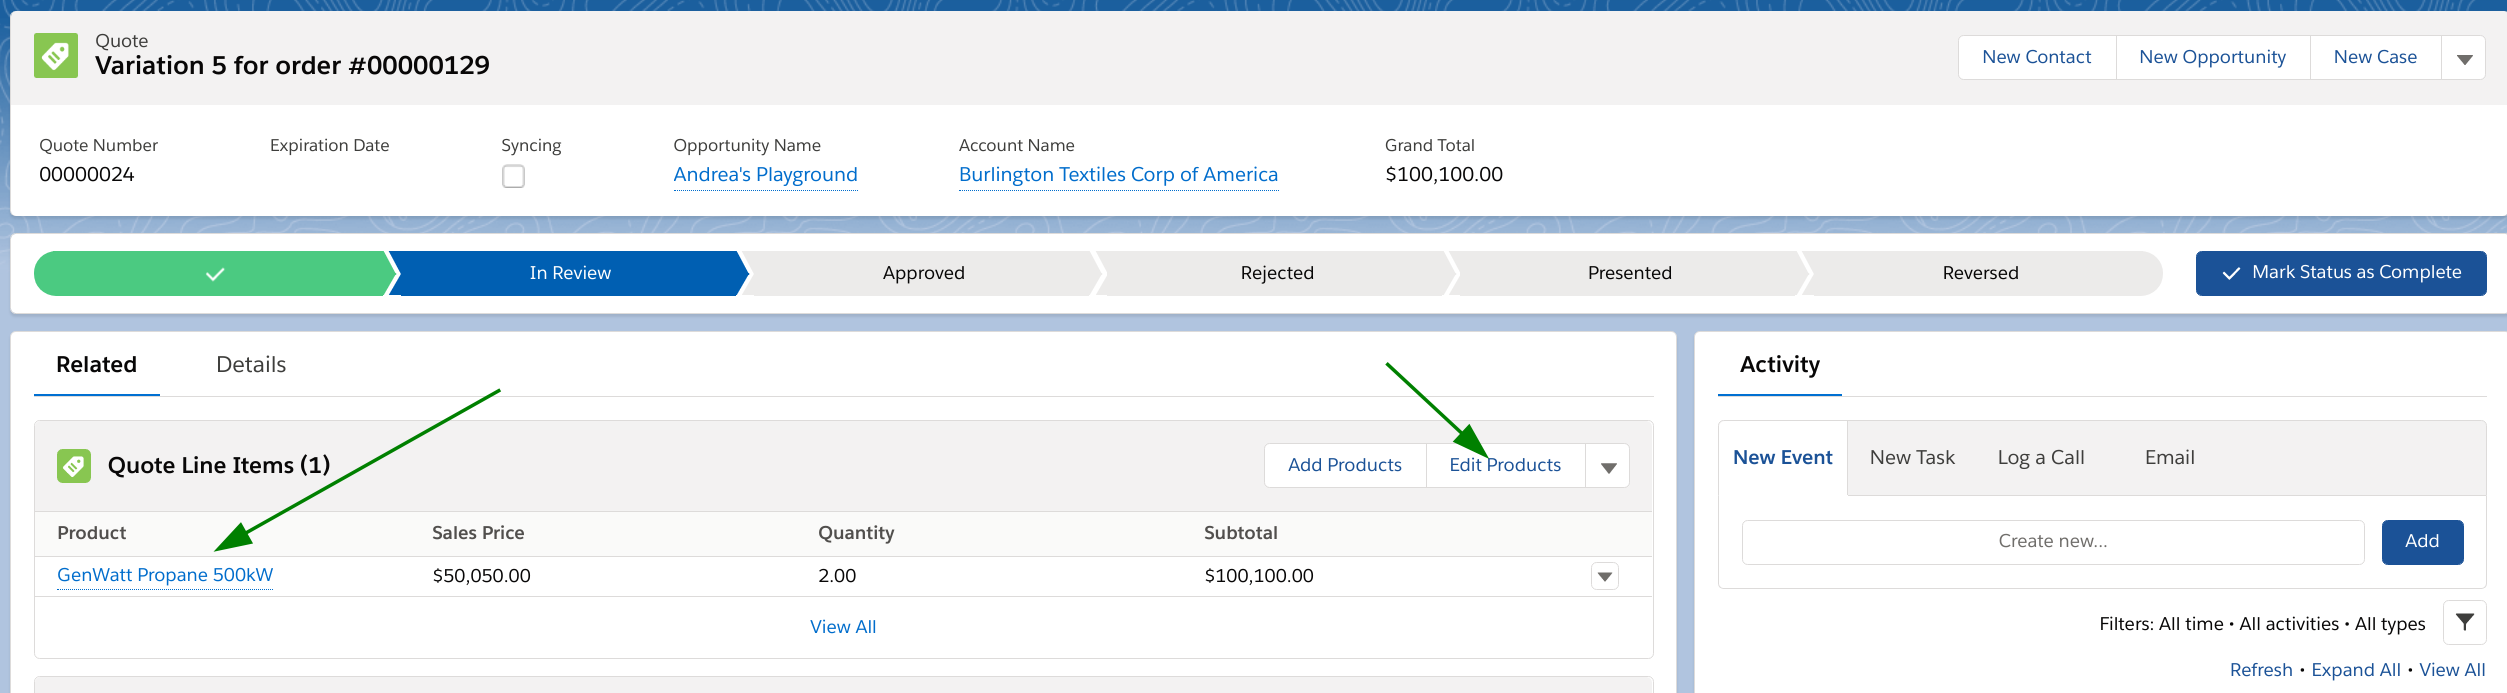
If you are working with the native inteface you should edit the details of each line item to make your changes.
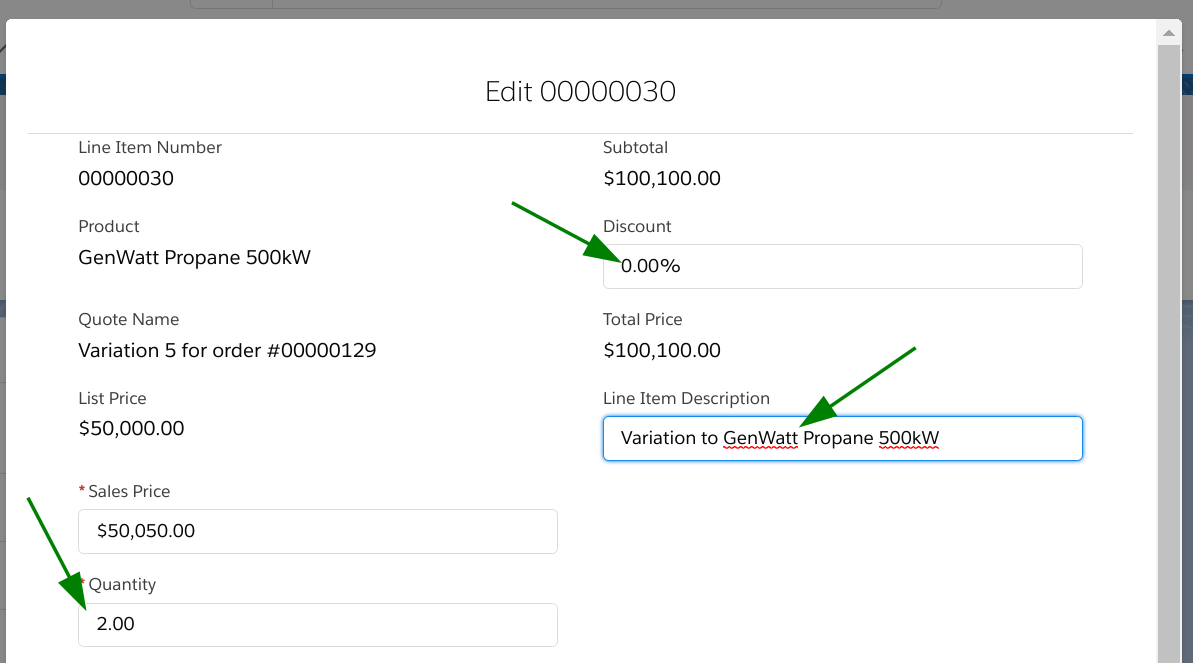
You should set the quantity for each line item to the quantity that the original order item will change by. In our example here we are adding an additional 2 units.
If you need to reduce the quantity in the original order you should use a negative quantity on the variation line item.
Once you are happy with the configuration of your variation you can print the 'Quote' pdf and send to the client for approval if approval is required
When the variation is approved simply mark the variation with the appropriate status to trigger the merge of approved products back the original order.
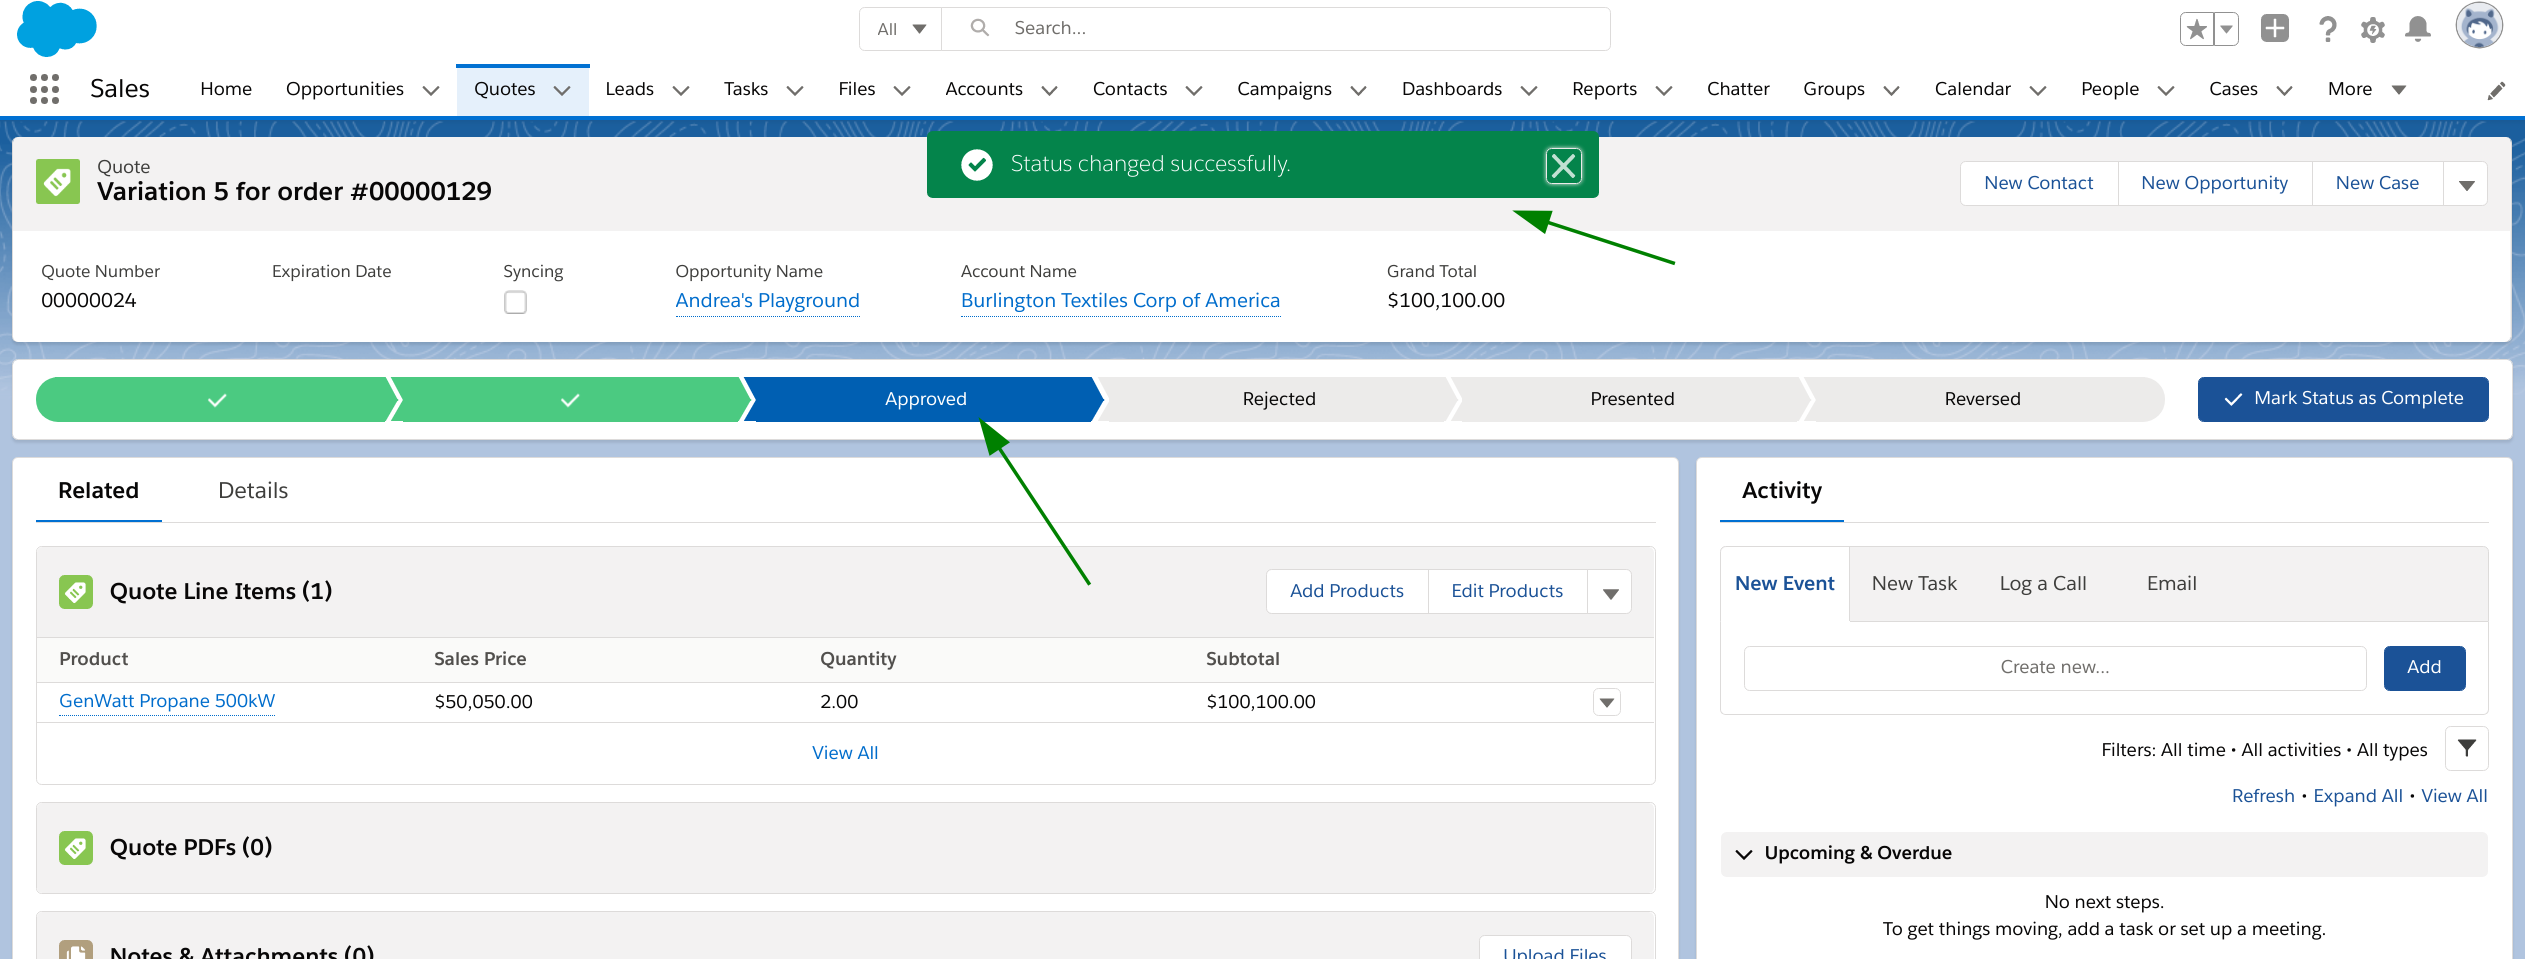
You can now navigate back to your original order to see the results
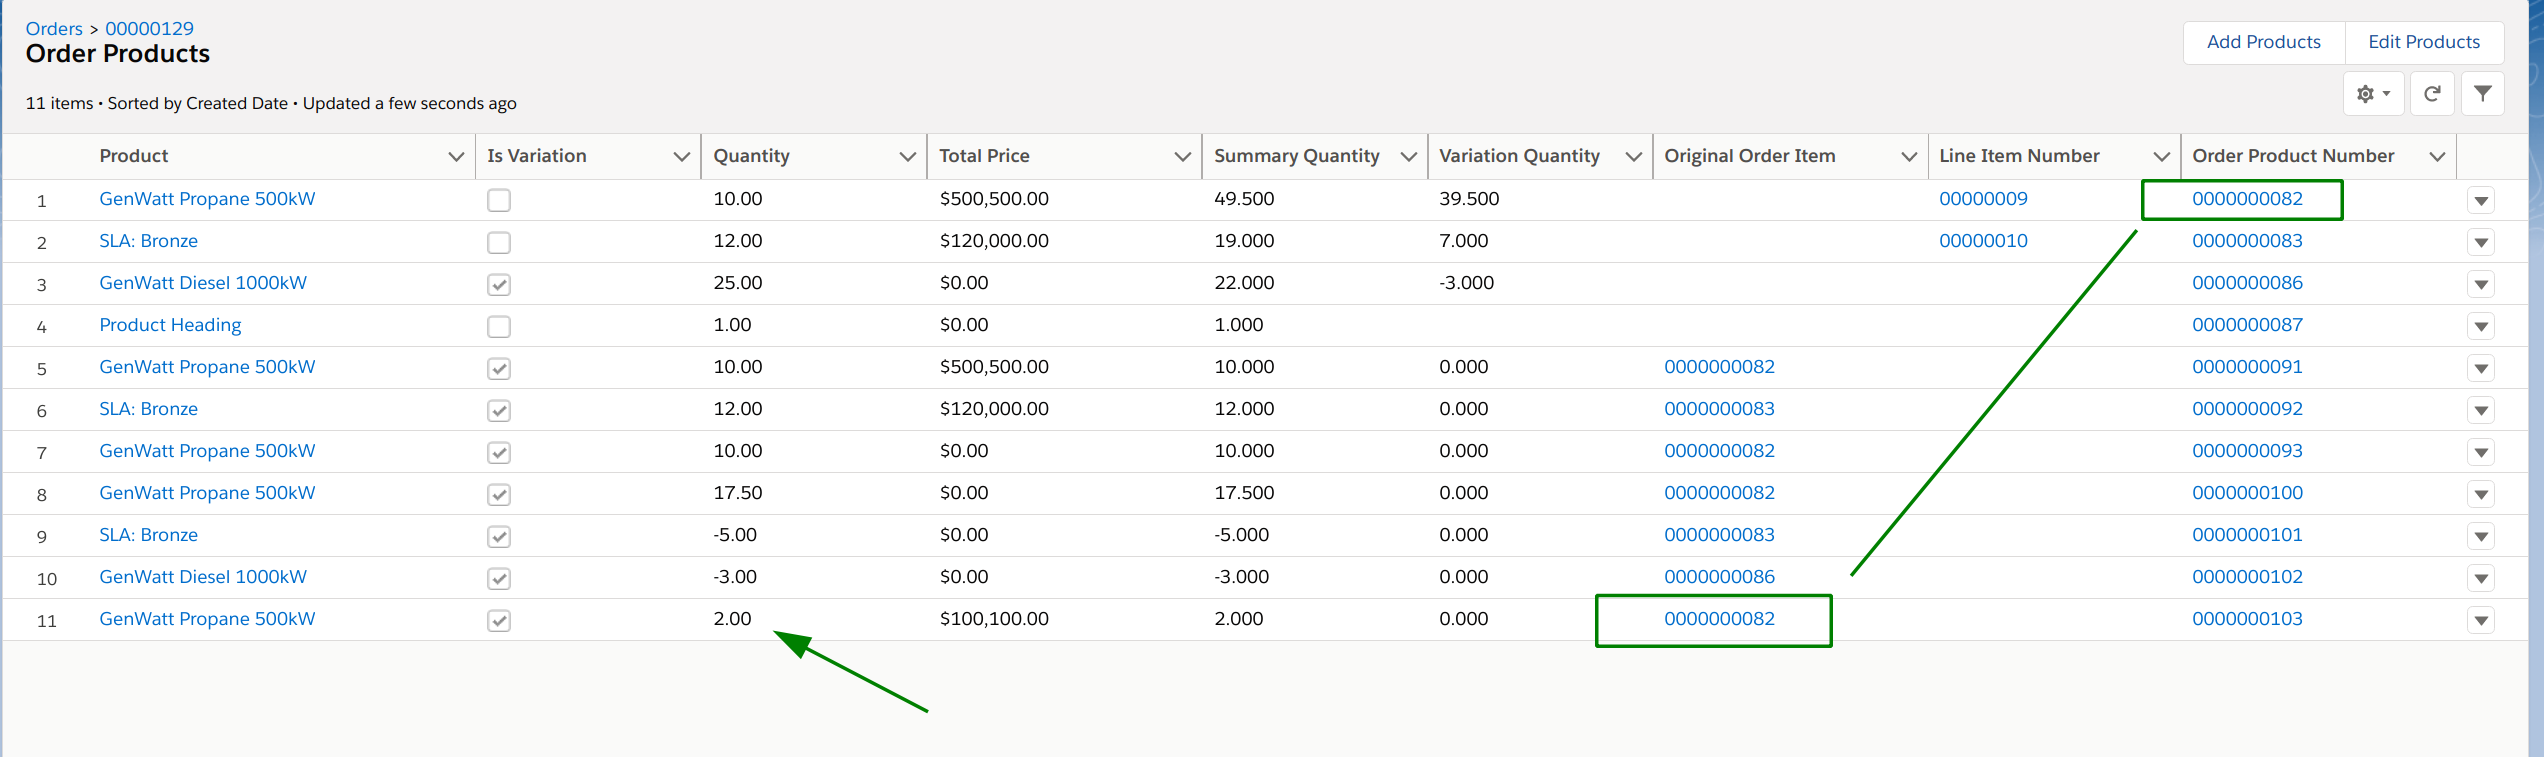
When you check the Variations related list on the Order you will see your most recent variation listed with the status of Approved
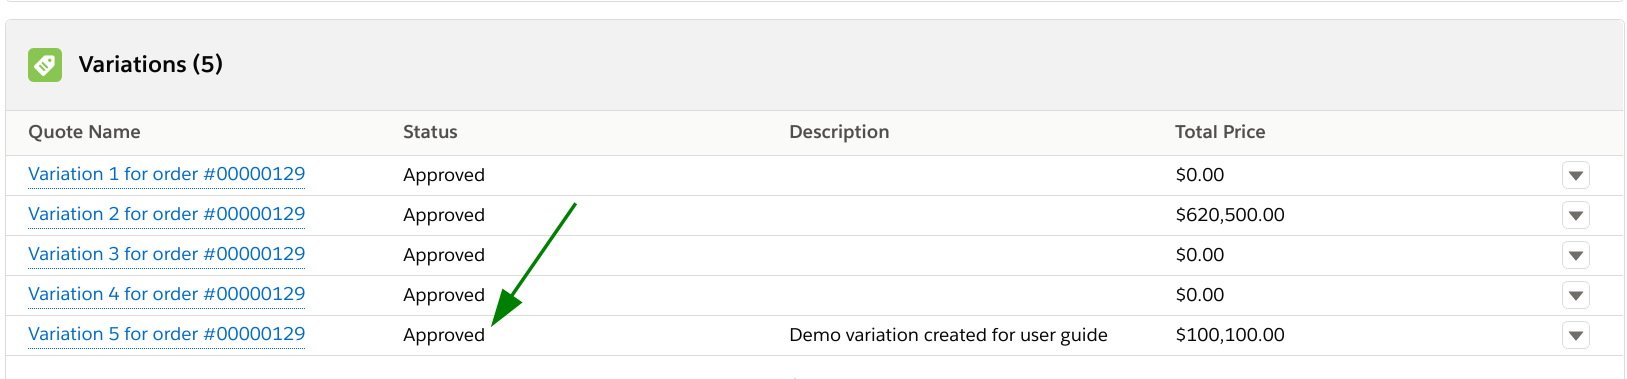
Checking the Order Products related list shows additional products added when the variation was merged back to the order.
Variation (Order) products are linked to the original order item as well as the variation item in the variation
How to create a variation for negative stock/quantity
The process for reducing the quantity of an order product is identical to the process for adding to the quantity except that you use a negative value for quantity in the variation instead of a positive value.
How to invoice a variation (negative or additional variation)
There are two different scenarios when invoicing variations.
- Invoice variation with original order items
- Invoice variation separate to the original order items
A variation with an overall negative value must be invoiced with the original order item as you cannot produce an invoice for a negative amount. Variations that have negative quantities use the summarize toggle to prevent the negatives being sent to Xero
For either scenario you should begin the invoice creation process as you normally would
Scenario 1 - Invoice with original order items
If you are creating an invoice that will include both original order items and their variations you need to tick the Include Variations checkbox and select the variations you would like to include items from
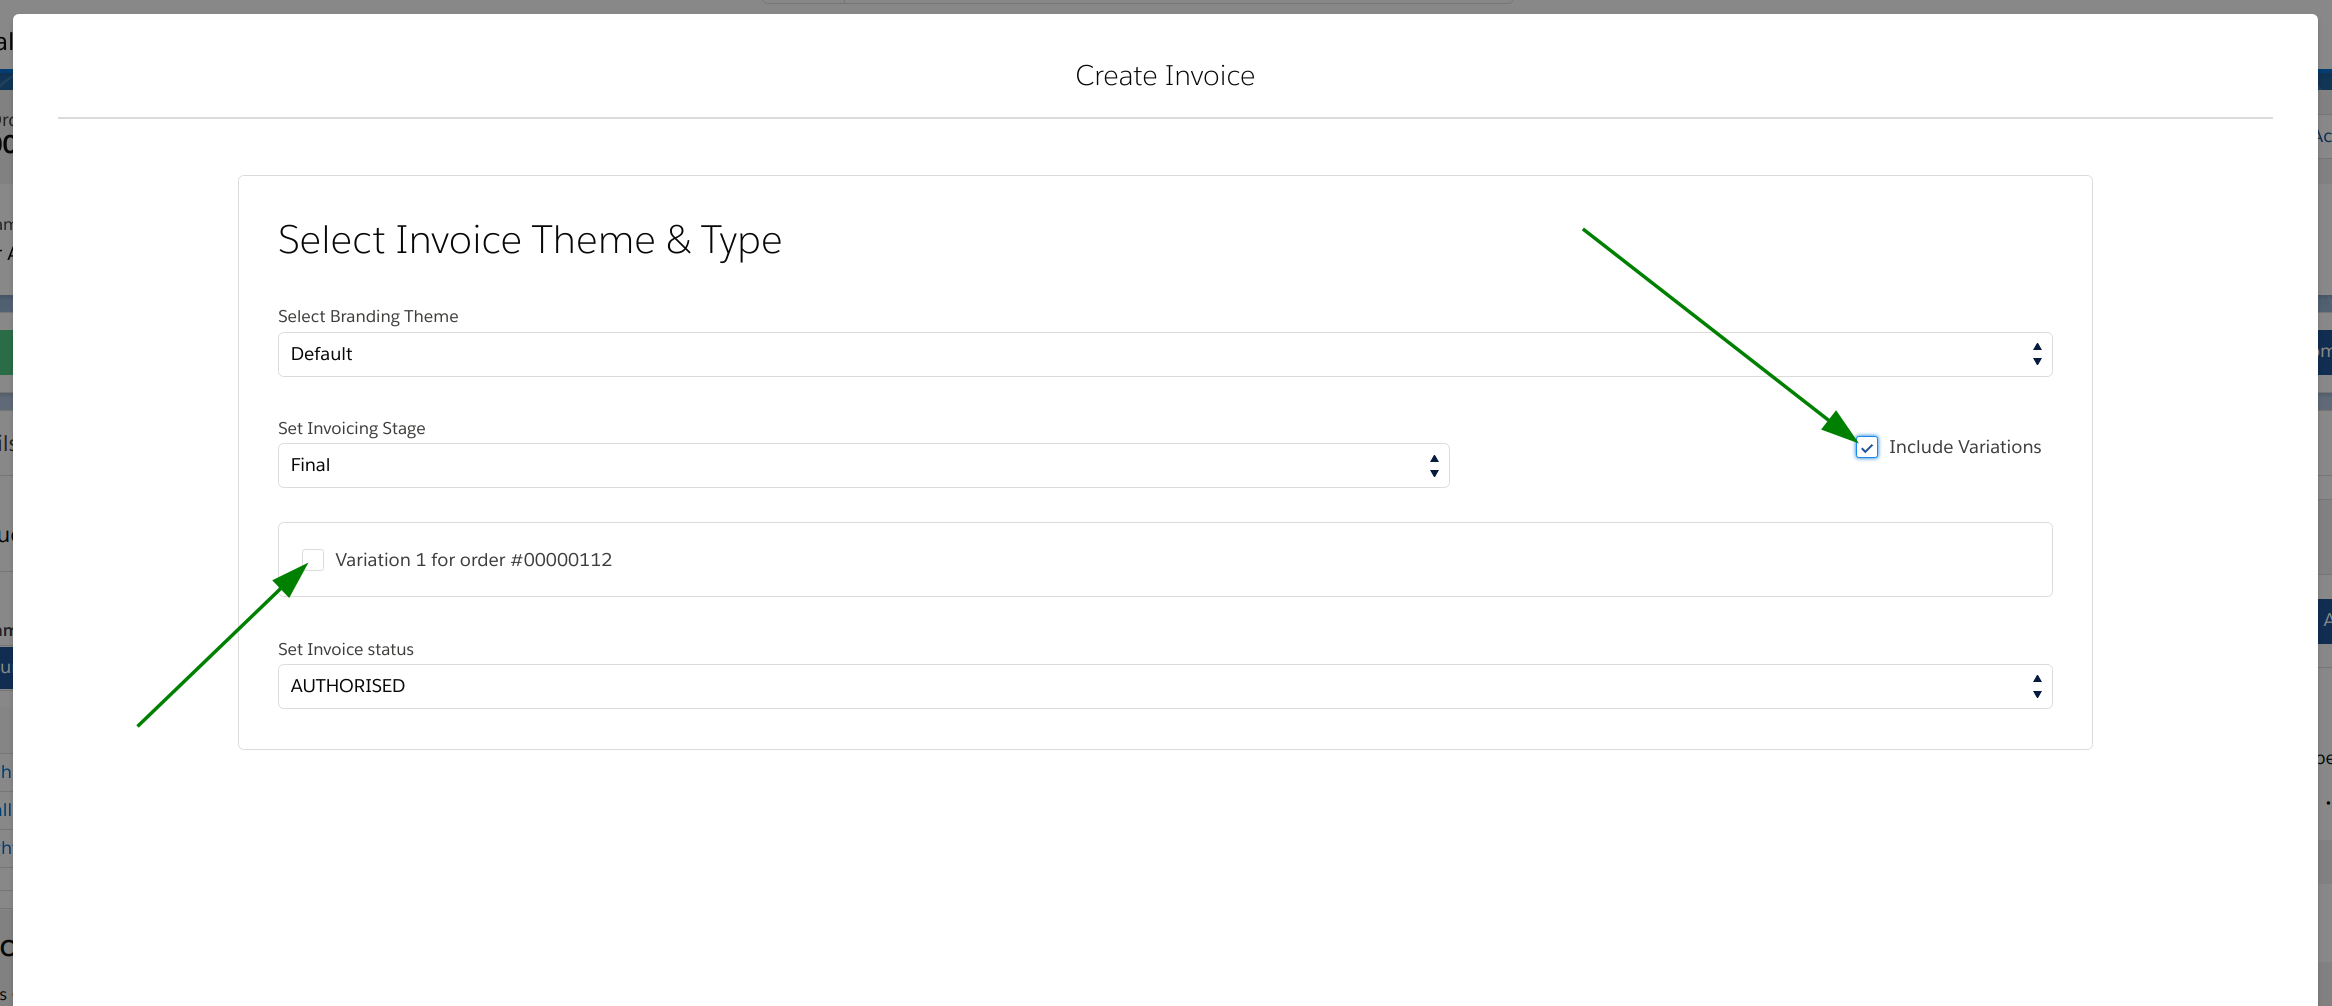
For this example we have selected Final as the Invoicing Stage but this could also be Deposit or Progress
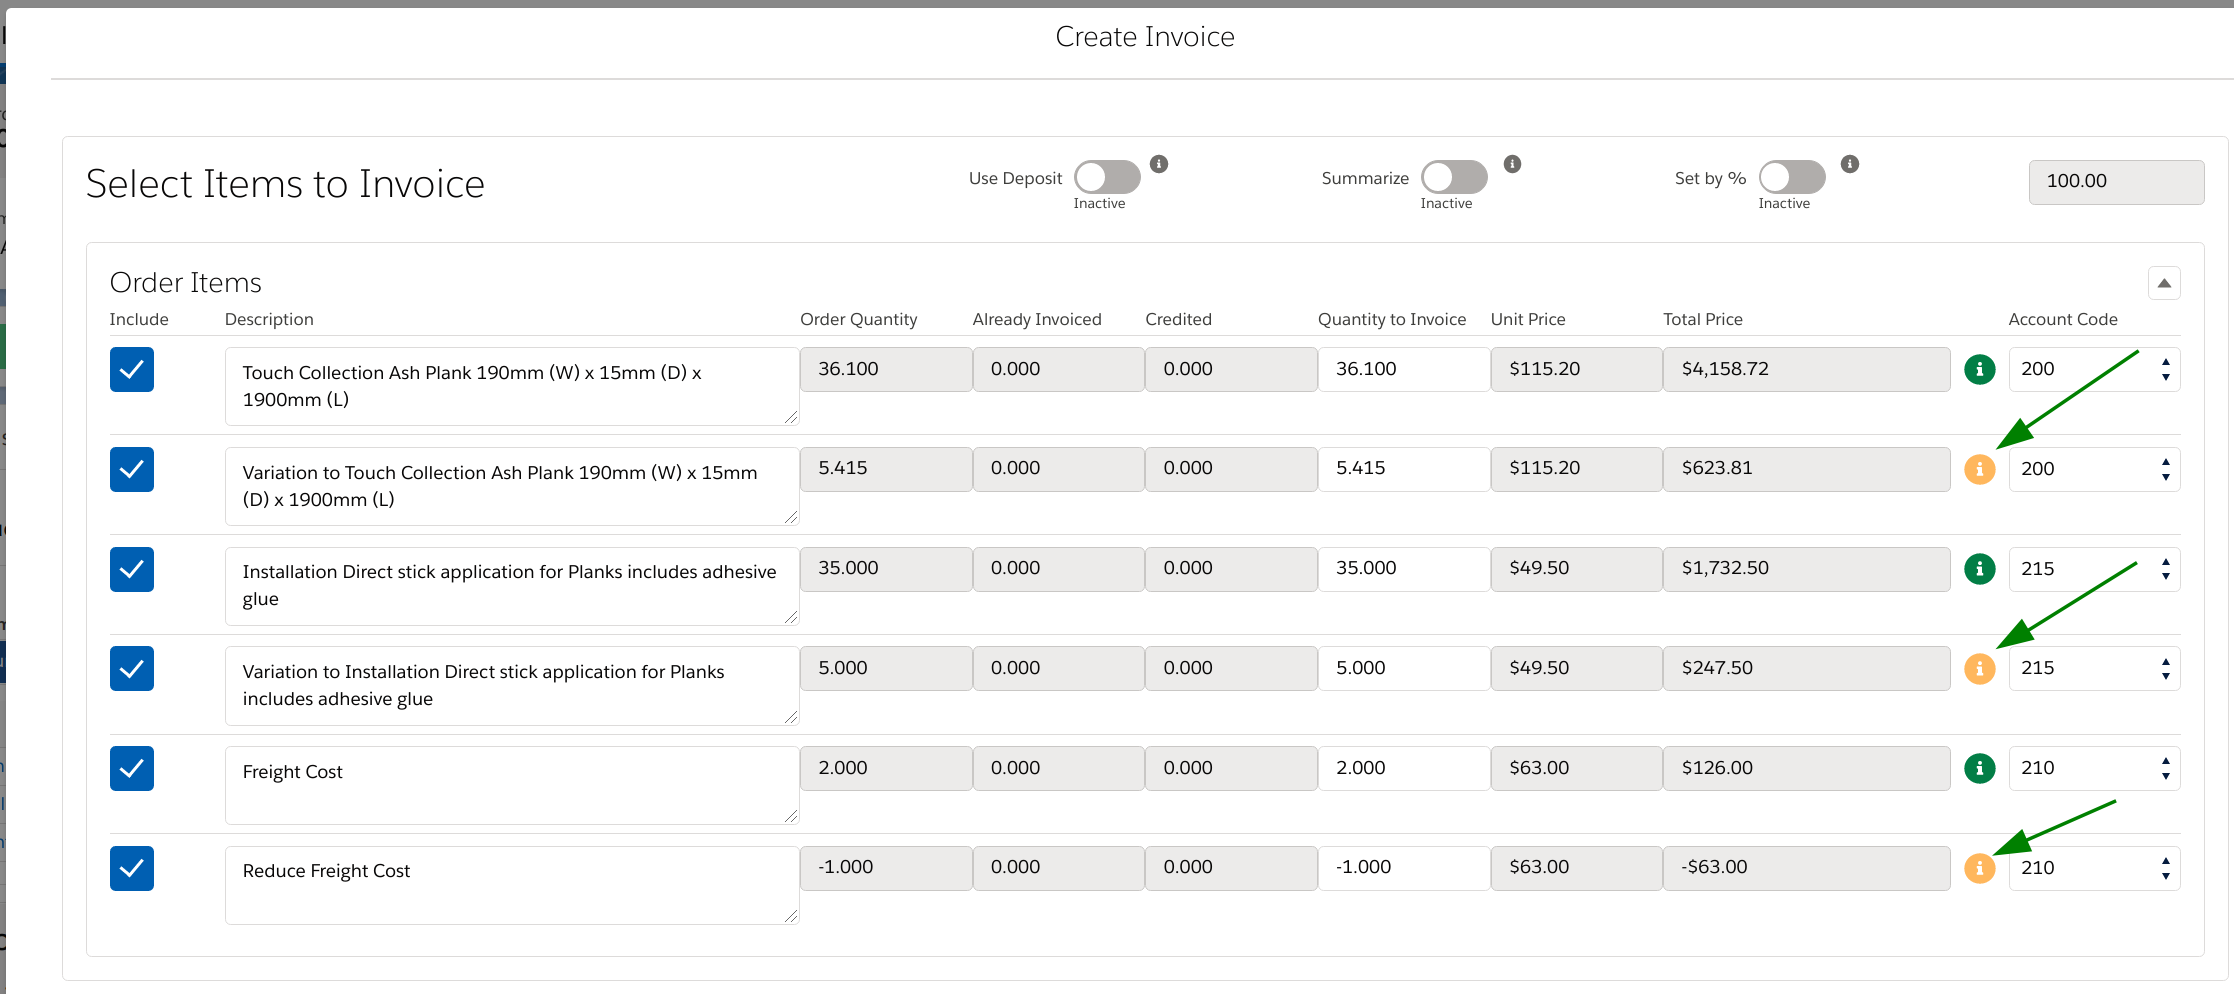
The image below shows the item selection screen with both variations and original items. The original items are marked with a green i and the variations are shown directly under the item they vary and marked with a yellow i
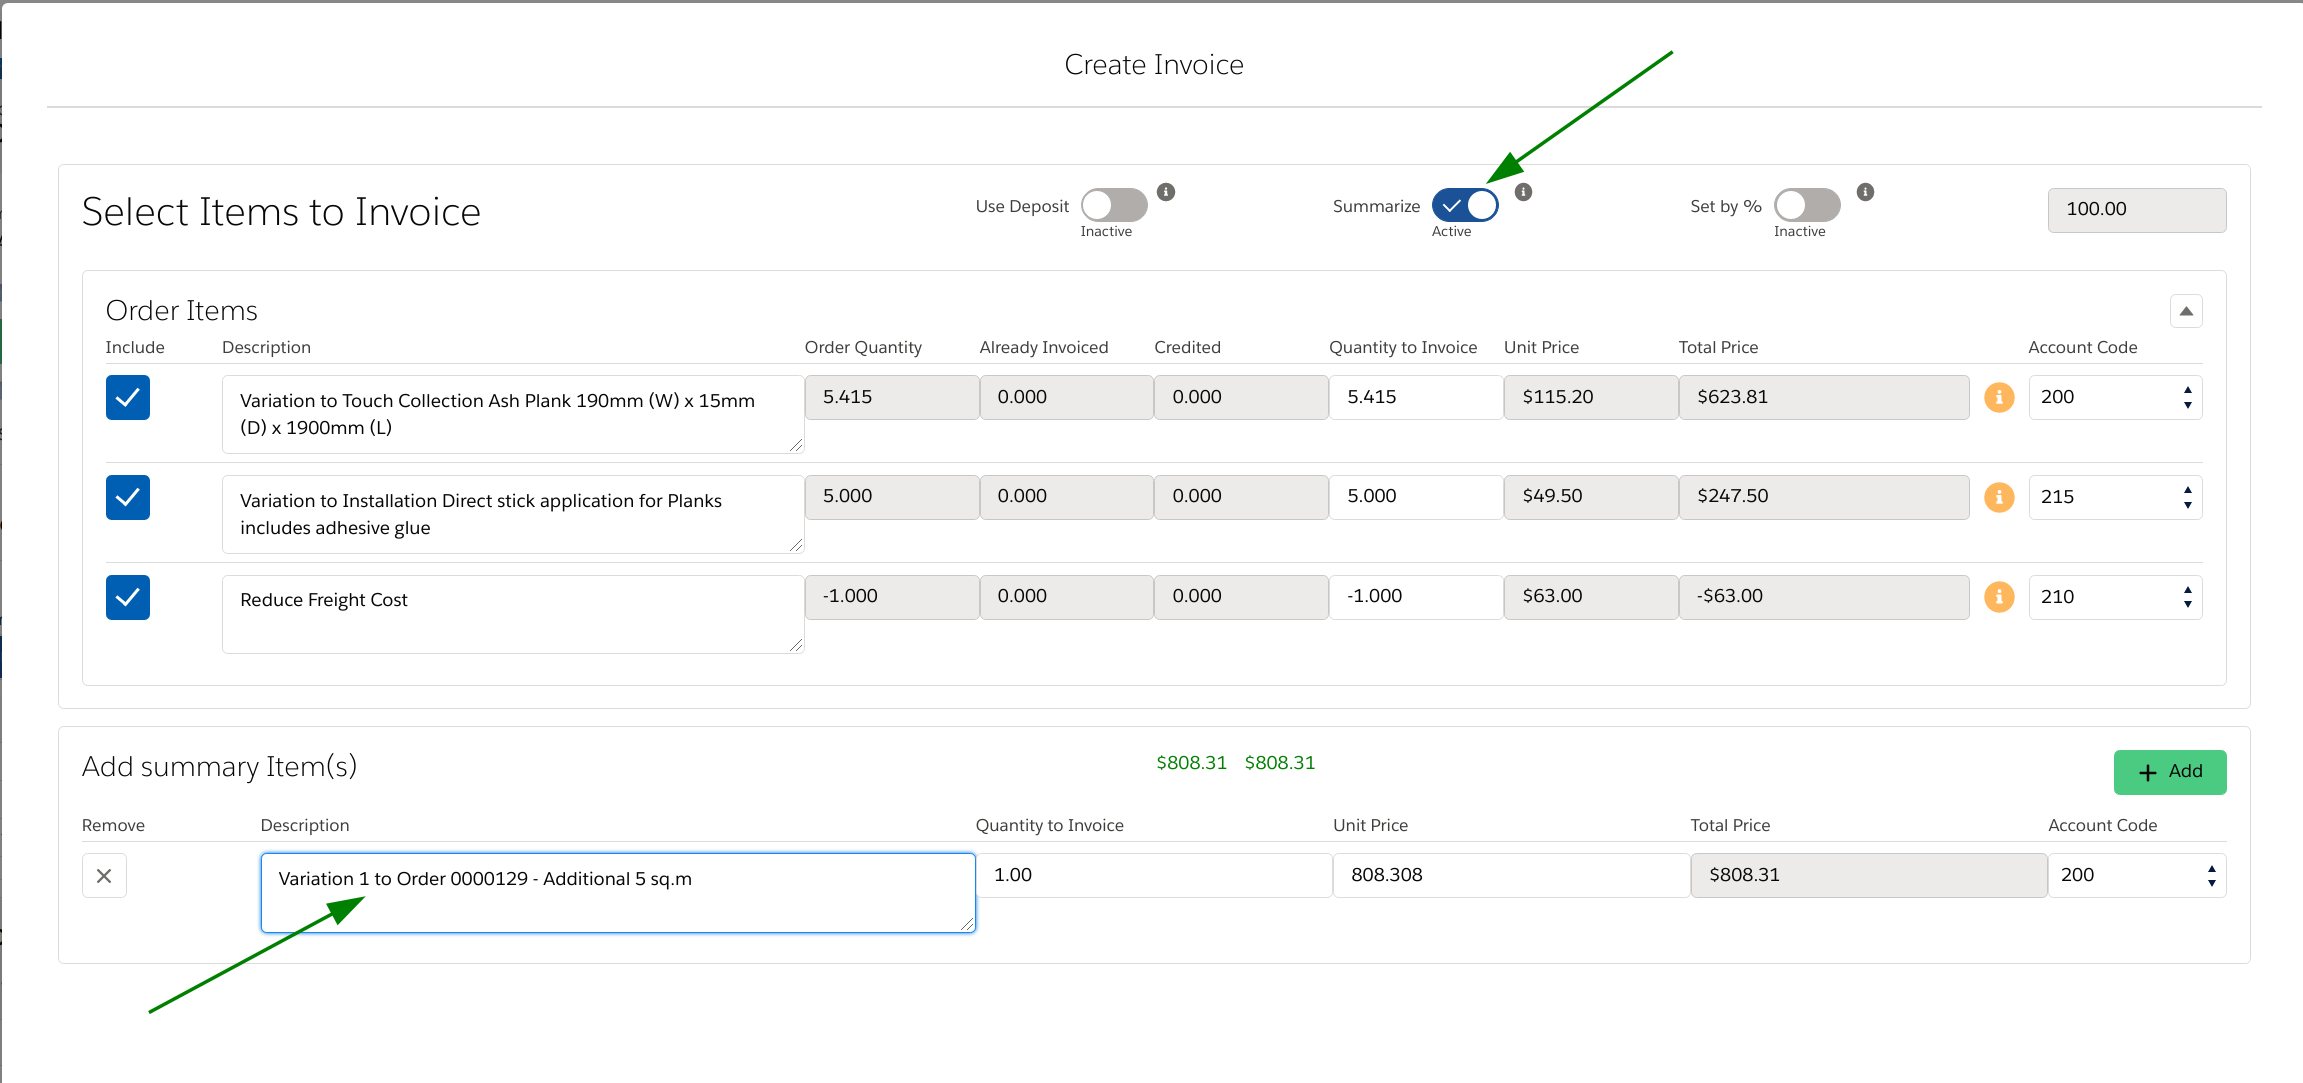
If you are including line items that reduce the original item (negative quantity) you must switch on the summarize toggle. If you do not summarize the system will attempt to send the negative quantity to Xero which will result in an error.
Summarizing the items allows you to create a single line from the original + variation that has an overall positive value.
If you do not have negatives in your variation you do not need to summarize although you may still choose to do so if it is appropriate
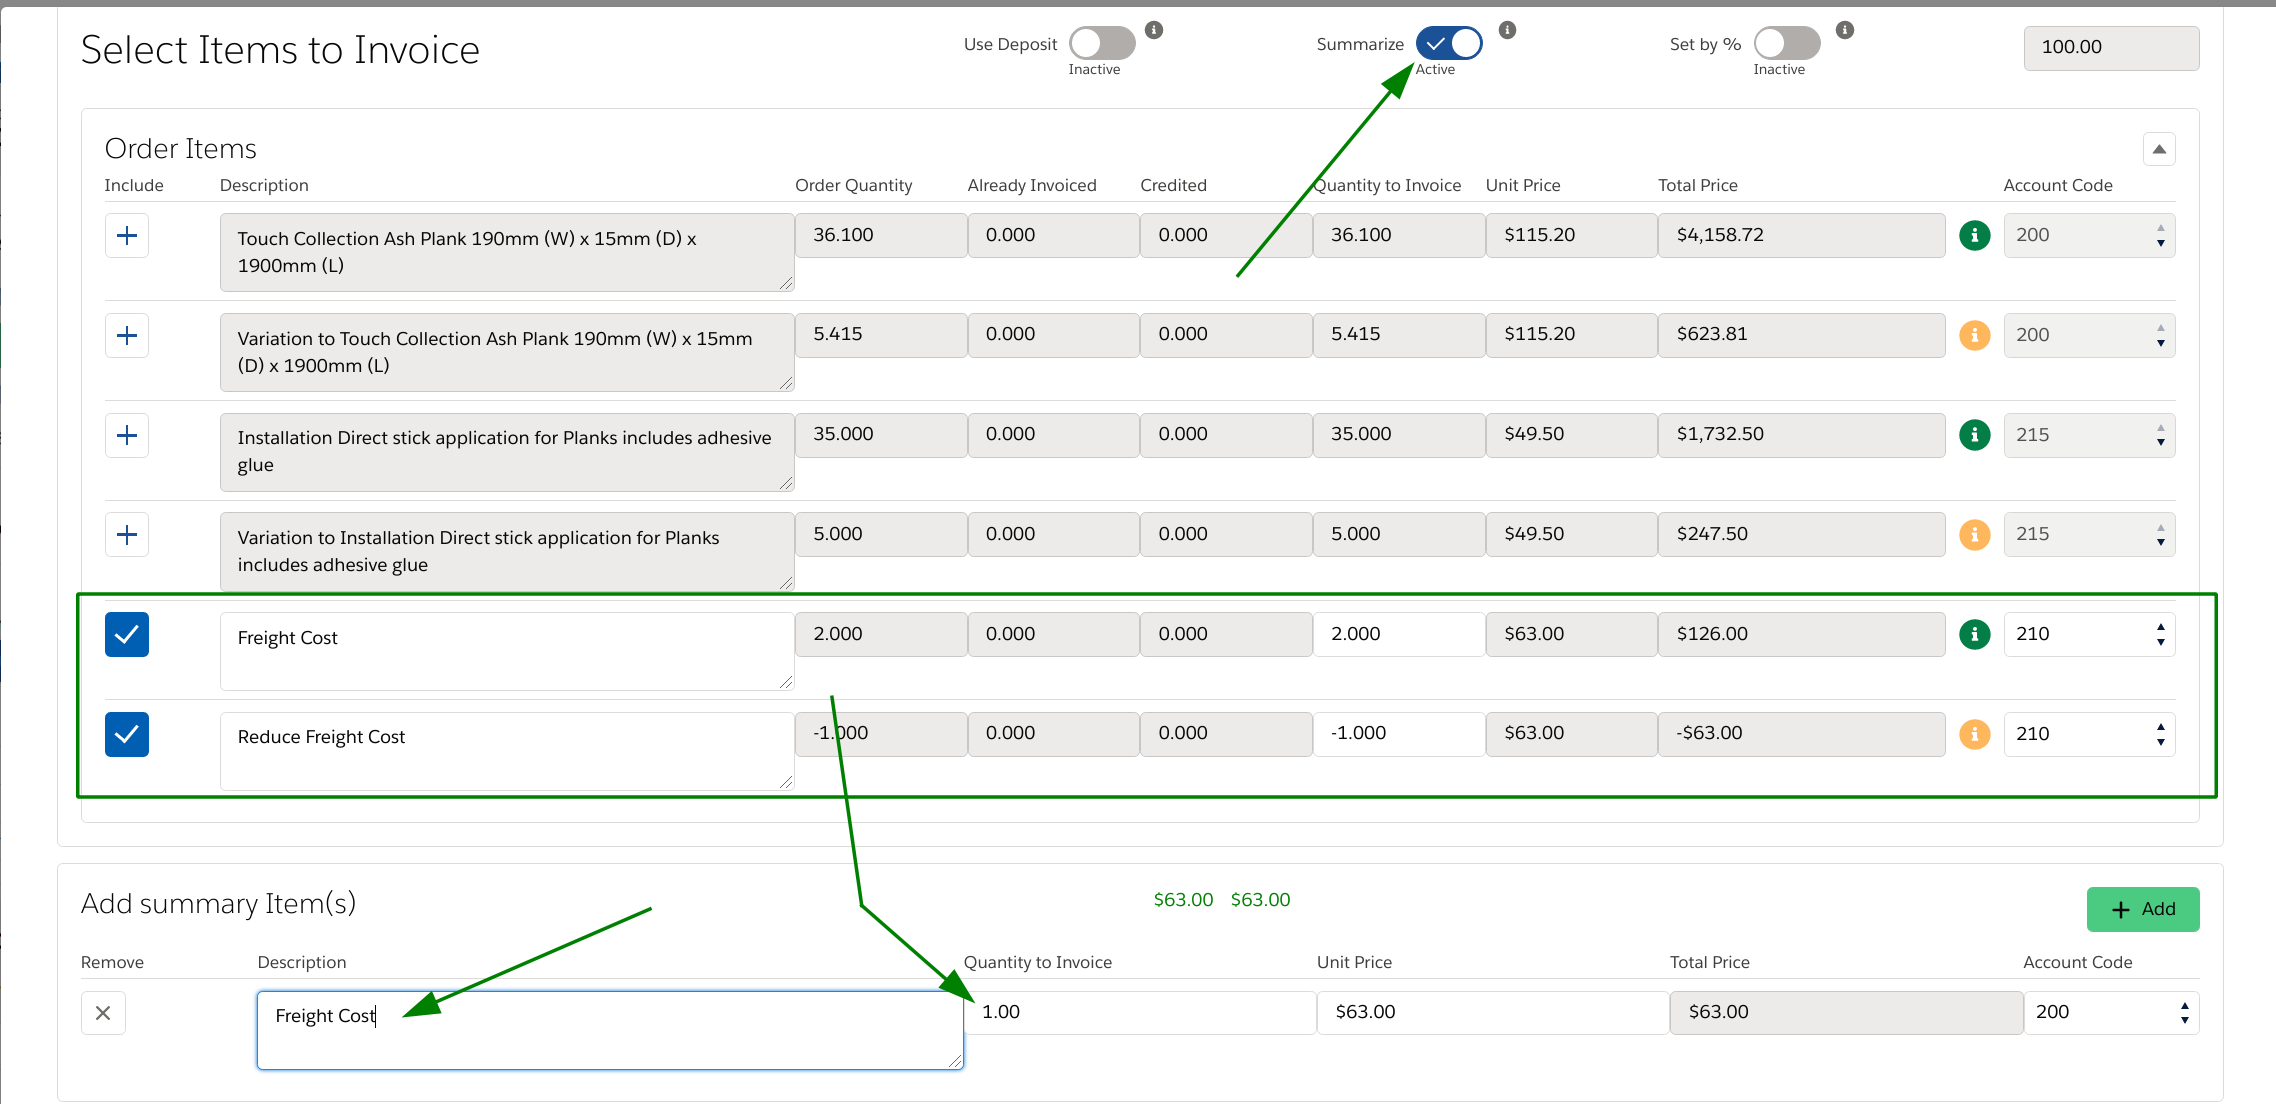
When summarizing items you must manually add the Description for your new item
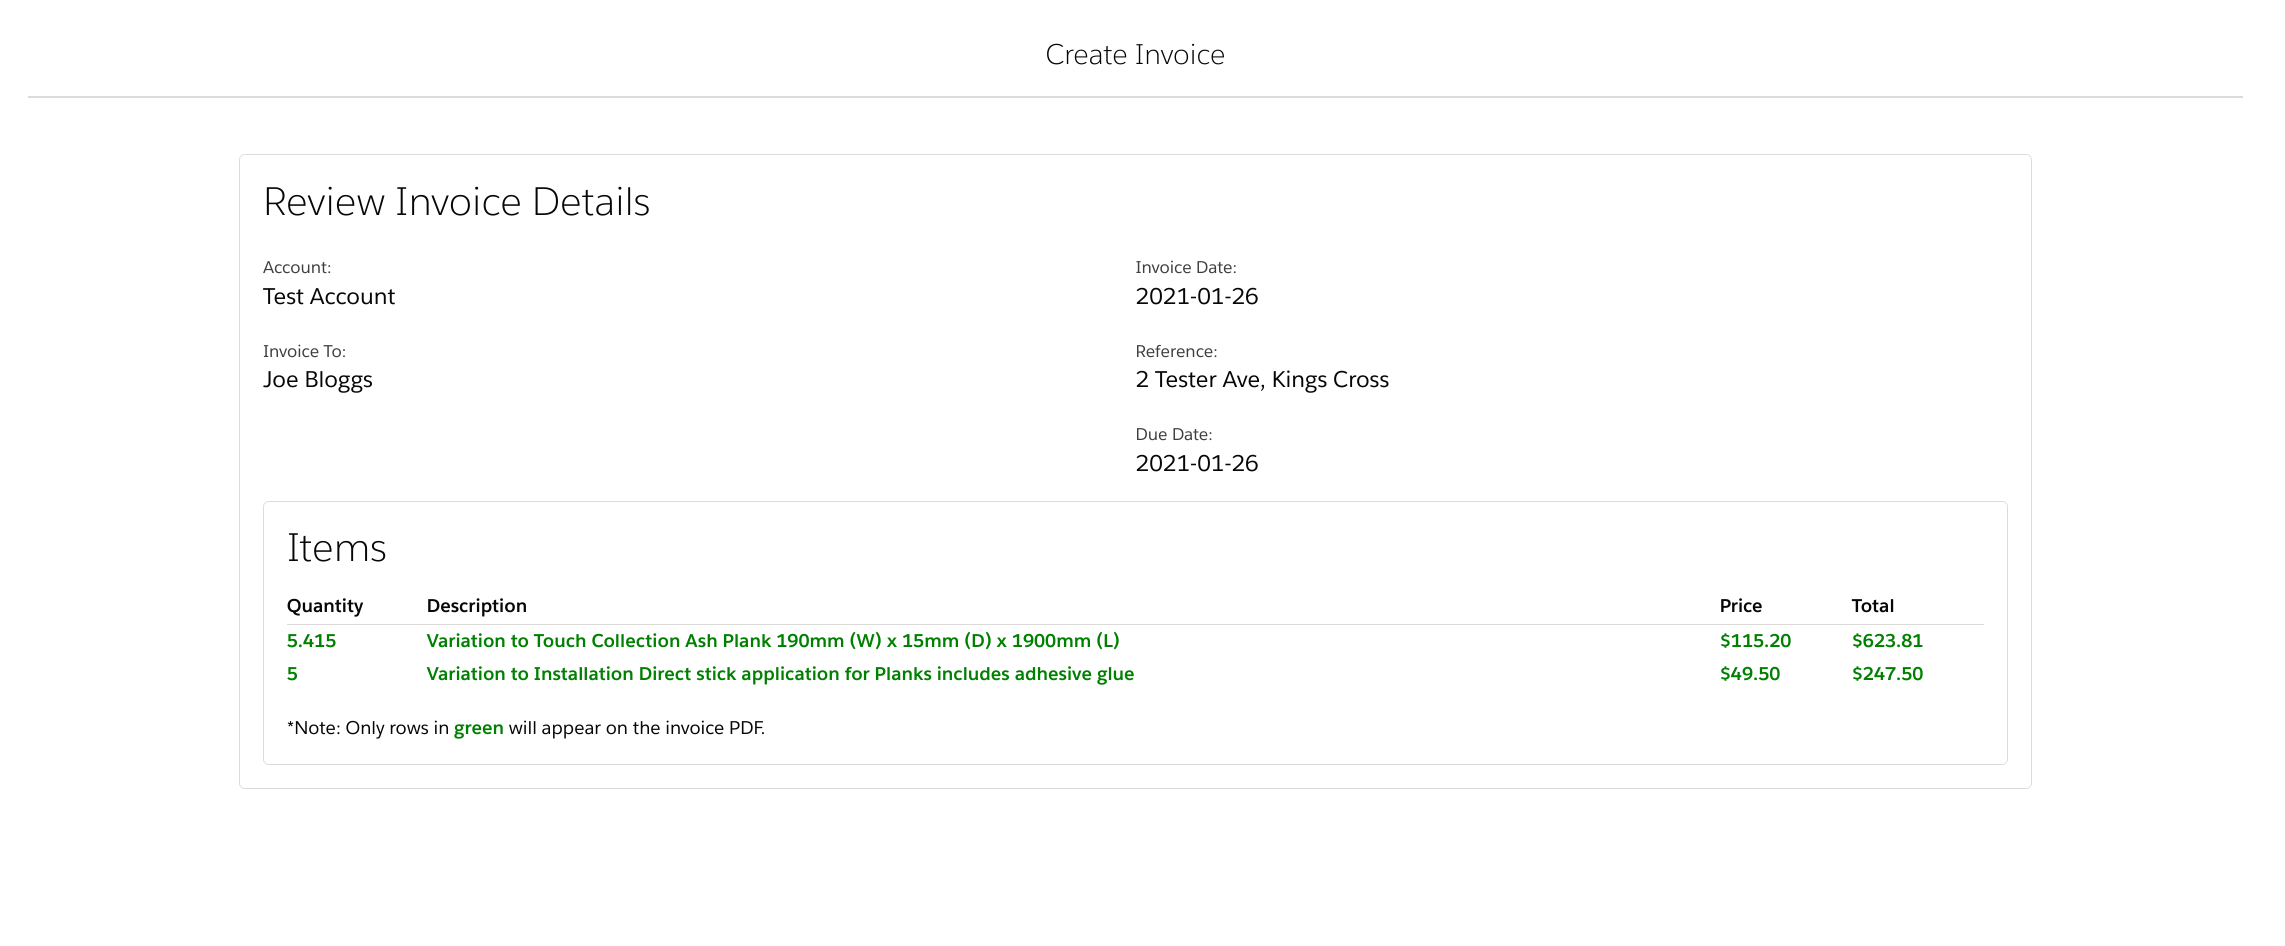
When you have selected the products to be invoiced you should press the next button to go to the review stage.
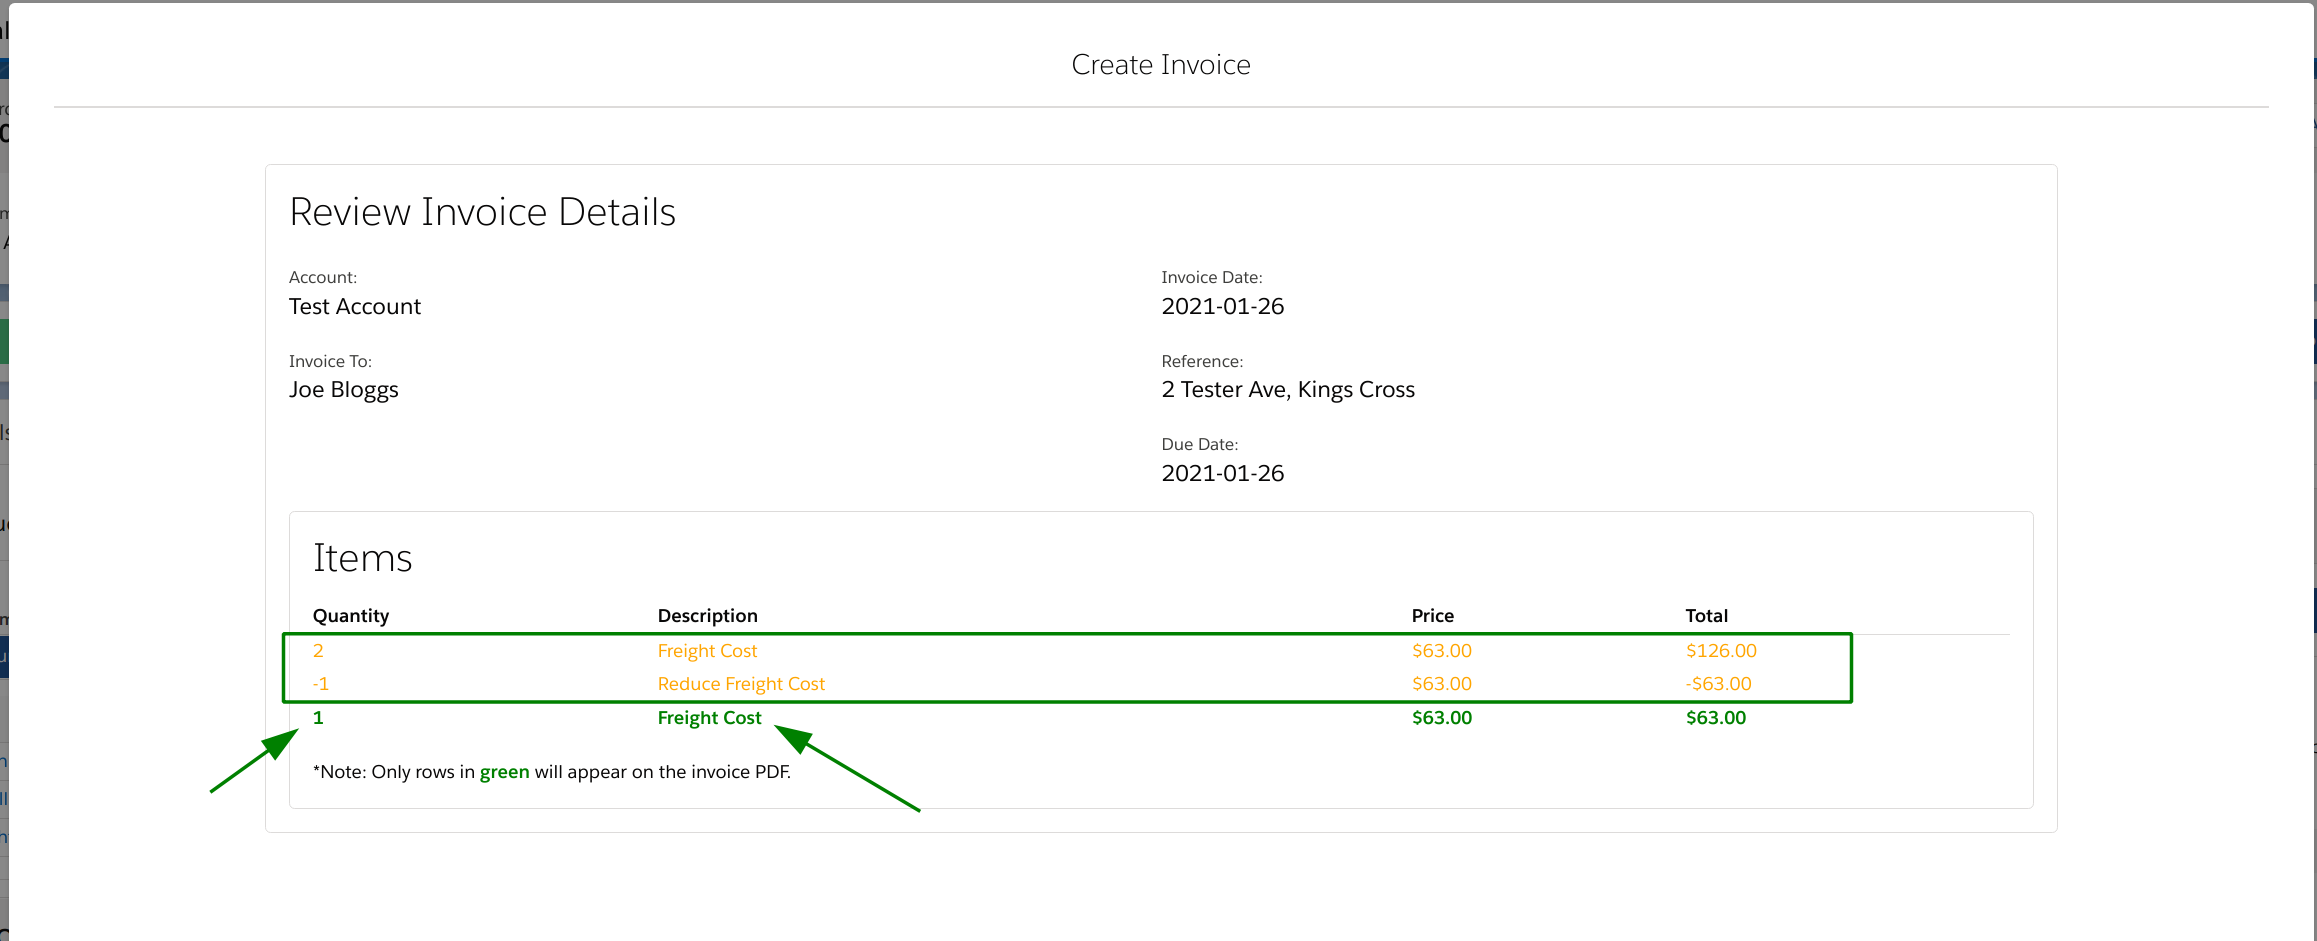
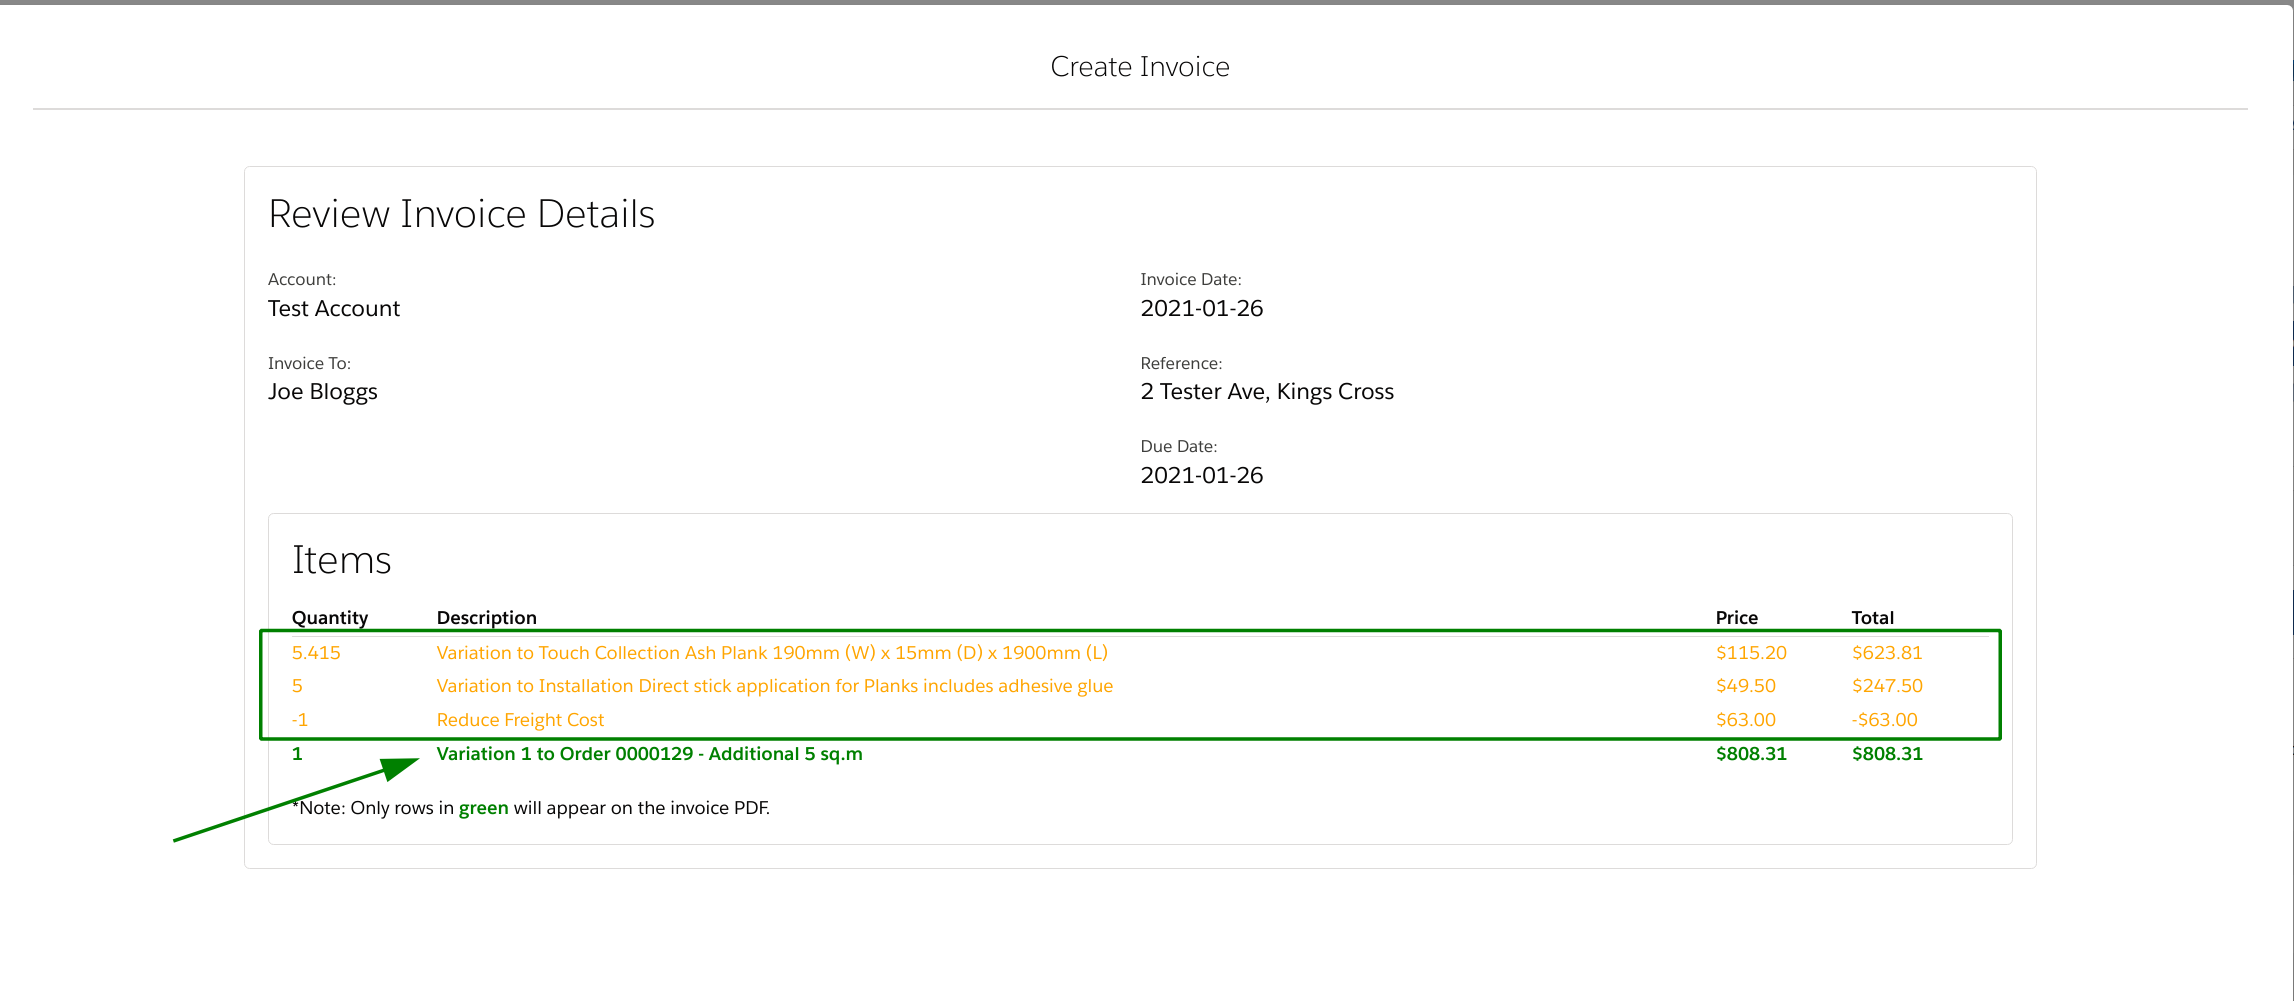
Only items listed in green on the review page will appear on the invoice. Items in yellow are summary items and are shown for reference only
If you are happy with the details on the review page you should go ahead and create your invoice. You will then be taken to the new invoice record page where you can use the Xero Sync button to send the details to Xero
Scenario 2 - Separate to original order items
To create an invoice that includes only variation items you should choose Variation for the invoicing stage. The Inlcude Variations checkbox is automatically selected for Variation stages and you only need to select the variation(s) you need to invoice from the list
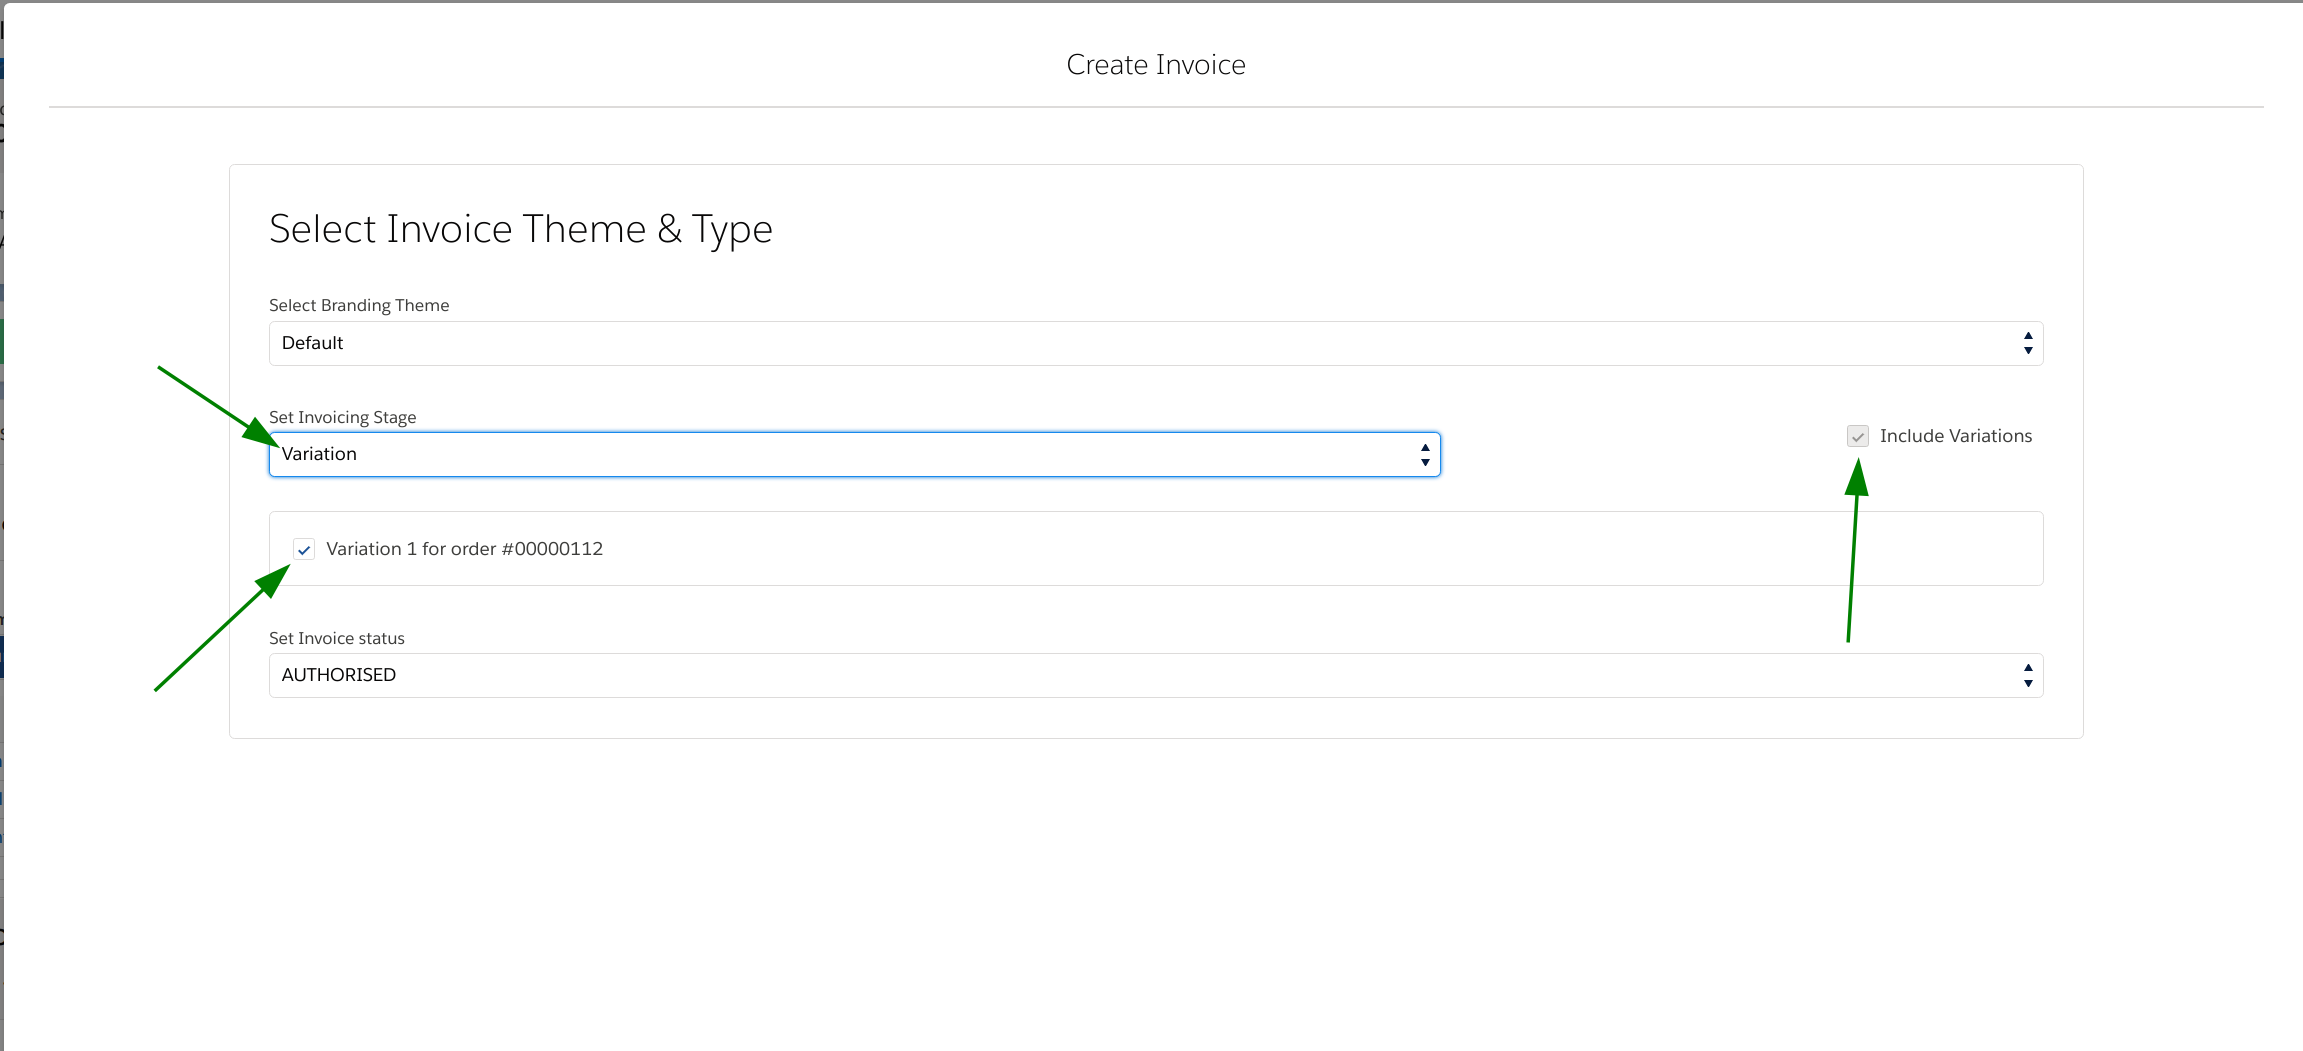
The select items screen will display only items from the variation you have selected. As mentioned above if you have items in your variation that have a negative quantity you must switch the Summarize toggle on. If you do not have negatives you can choose if you want to summarize or not
In this example we are summarizing the variation into a single line
When you have selected the products to be invoiced you should press the next button to go to the review stage.
Only items listed in green on the review page will appear on the invoice. Items in yellow are summary items and are shown for reference only
If you are happy with the details on the review page you should go ahead and create your invoice. You will then be taken to the new invoice record page where you can use the Xero Sync button to send the details to Xero
Below we show the last two steps again but without the summary option being used
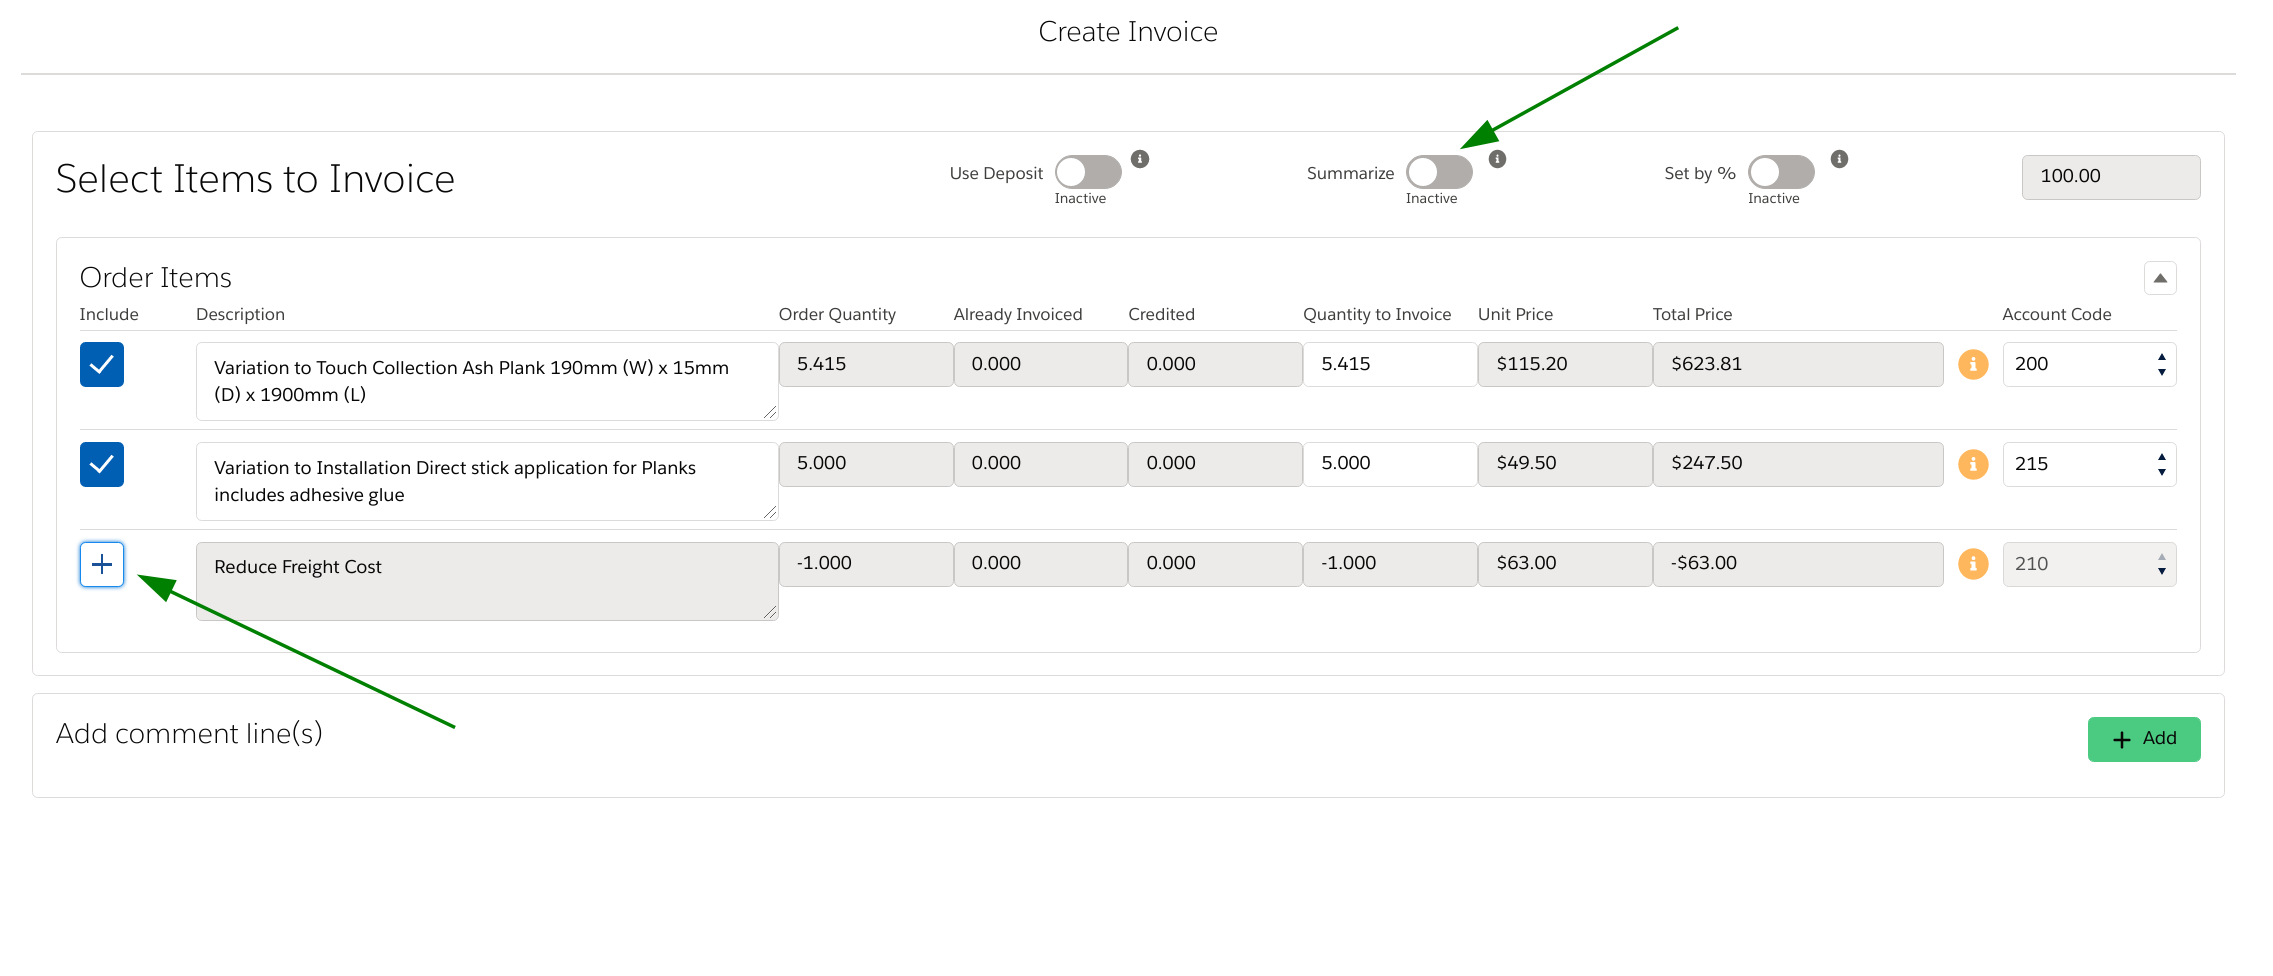
Notice how all items are now shown in green which tells us they will all apprear on the invoice